In order to install Windows XP Professional using the Remote Installation Service, you must install the RIS on a Windows 2000 server (either Server, Advanced Server or Datacenter) using the Remote Installation Services Setup Wizard. The server can be a member server or a domain controller, it doesn't make a difference, however, what must be present on the network in order to use RIS are the following services:
DNS
RIS relies on the DNS service for locating both the
directory service and client computer accounts.
DHCP
The DHCP service is required so that client
computers that can receive an IP address.
Active Directory
RIS relies on the Active Directory service in for
locating the RIS servers.
The shared volume where the RIS data is installed cannot be on the same drive that is running Windows 2000 Server. The volume must be large enough to hold the RIS software and the various Windows XP Professional images that are installed and that volume must be formatted with the NTFS 5 file system.
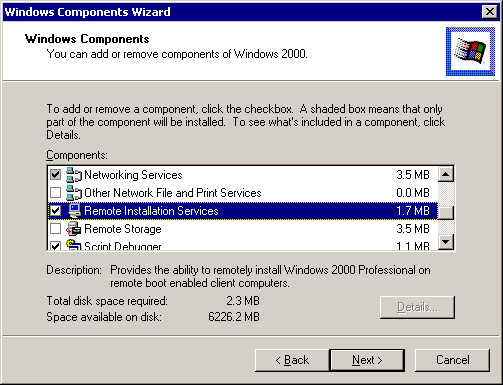
You begin the RIS server setup by logging on to the server with an account that has administrative permissions, and go to the Control Panel and select Add/Remove Programs. From here you will need to choose Add/Remove Windows Components and make
sure that you have either the Windows I386 directory available for the installation or the Windows 2000 Server CDROM.
In the Add/Remove Windows Components window, select Remote
Installation Services.
From this point, the remainder of the installation is automatic. (If the I386 source files cannot be found the system will prompt you to locate them.)
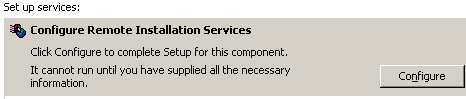
When the installation is completed, you'll need to restart your server to configure your RIS services.
You need to go back into the Control Panel and choose Add/Remove Windows Components again in order to start the configuration. (You can also type RIsetup from the run line or a command prompt as well.)
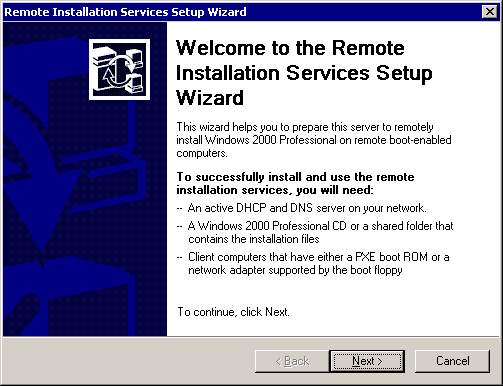
Click on Configure to begin. This will launch the Welcome to the Remote Installation Services Setup Wizard, as shown below.
(The window below is the first thing you will see if you choose to type RIsetup from the run line or a command prompt.)
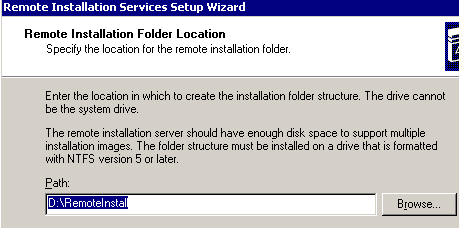
Once you continue you will be prompted with the default Remote Installation folder location of D:\RemoteIstall. You can elect to keep the default path or browse to a new location.
The volume you opt to use must be large enough to hold the RIS software and the various Windows XP Professional images that will be installed and the volume must be formatted with the NTFS 5 file system.
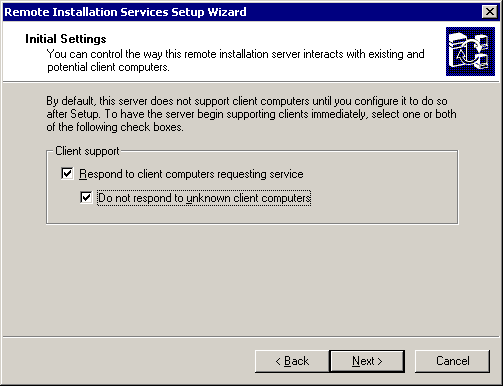
By default, Remote Installation Services servers do not respond to requests for service from client computers. There are two
settings available to use on the server.
If you select the Respond to clients requesting service option, Remote Installation Services is enabled and will respond to client computers requesting service.
Additionally, if you select the Do not respond to unknown client computers option, Remote Installation Services will respond only to known (prestaged) client computers.
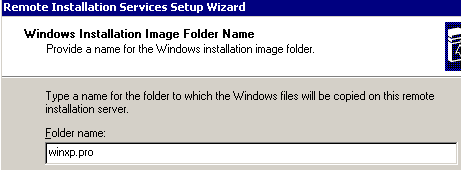
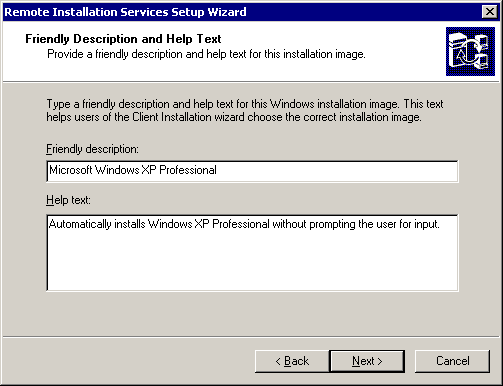
You will also need to provide a name for the Windows installation image folder, as well as a friendly description for each image you install on the RIS server.
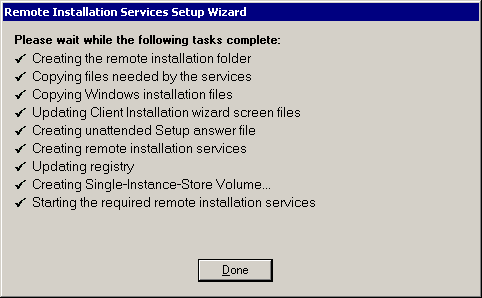
The last step the wizard performs is actually a series of events, as outlined in the image above. Once the final step is completed, the setup wizard starts the required services for RIS to run. The server is complete at this point and will
service client requests for CD-based installs.
Client computers that support remote installation must either meet the Net PC specification (which is, effectively, a
system which can perform a network boot) or have a network adapter card with a PXE boot ROM and BIOS support for
starting from the PXE boot ROM.
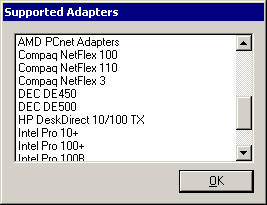
Some client computers that have certain supported PCI network adapter cards can use the remote installation boot disk as well.
This support is somewhat limited and can only be used with certain motherboards, as the BIOS settings for booting the system from the network needs to be configurable.
The RIS service provides the Windows 2000 Remote Boot Disk Generator if your system does support starting from the PXE boot ROM. You can create a Remote Boot Disk by typing <DRIVE LETTER> RemoteInst\Admin\i386\rbfg in the RUN box or at a command prompt. (The drive letter is the drive where you installed the RIS services and will vary from server to server).
The boot disk simulates the PXE boot process on your system when your network card does not have the required PXE boot ROM for a RIS installation. (Again, only a small number of PCI network cards currently support using the Remote Boot Disk. This
includes mainly 3COM and a small cross section of other major vendors.)
The user account used to perform a RIS installation must be assigned the user right of Log On as a Batch Job. The users must also be assigned permission to create computer accounts in the domain they are joining if this has not been done ahead of time. There are other factors as well, such as prestaging a client. For the purposes of this overview, we will go through a "plain vanilla" RIS installation from a boot floppy.
When the client system starts from the boot floppy you would press F12 when prompted to boot from the network.
The Client Installation Wizard will start and you will need to supply a valid user name and password for the domain you're joining as well as the DNS name of the domain. Once this is done you can press Enter to continue.
You are then given the option of performing an Automatic Setup, Custom Setup, or to Restart a Previous Setup Attempt, or use the Maintenance and Troubleshooting Tools installed on the RIS server. You would choose one of the options and then press Enter.
The next screen will show a number of RIS images (including the default CD-based image) that you can use. (The number will depend on what has been placed on the server by the administrator and whether or not you have the proper access permission to read them.) Choose an image and then press Enter.
You will be presented with one last opportunity to verify that the settings are correct. Once you're sure that they are, you would press Enter to begin the RIS installation. When it is complete, Windows XP Professional will be deployed to the client system and available for use upon restart.
Well, that's a wrap for this week.
Best of luck in your studies and please feel free to contact me with any questions on my column and remember,
If you allow a bad guy to upload programs to your Web site,
it's not your Web site anymore.