Windows Mobility Center is a component that centralizes important information to mobile computing. Mobility center enables you to access various settings like speaker volume, wireless network connection status, and display brightness in a quick and efficient manner. The Windows Mobility Center feature is available on laptops, notebooks, and tablet PCs by default. It is not available on desktop computers unless you enable it manually. But this feature is not available in the Windows 7 Starter edition. Presentation settings in Windows Mobility Center are not available in Windows 7 Home Premium edition and are only available in Windows 7 Ultimate, Professional, and Enterprise editions.
Configuring Windows Mobility Center Options:
Click Start, and then click Control Panel.
Click Windows Mobility Center, and if you cannot locate this link in Control panel, then type Windows Mobility Center in the search box of control panel. Then click the link Windows Mobility Center.
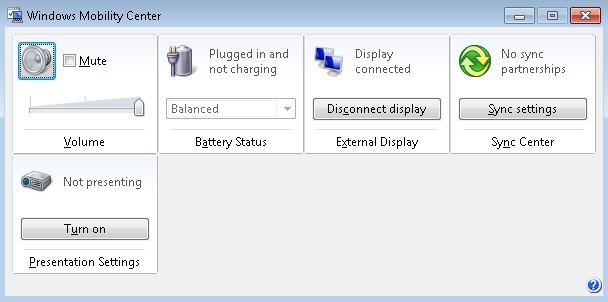
Windows Mobility Center displays the commonly used settings, such as brightness, volume, battery status, and wireless network status. Different tiles containing these settings are displayed depending on your system, and your laptop manufacturer.
If a setting doesn't appear, the possible reason may be that the required hardware, such as a wireless network adapter, or driver is missing or turned off. For example, if the Turn wireless on button is not available, you might have to use the hardware switch on your computer to first turn on the wireless adapter.
Following are some settings that you find in Mobility Center but all the settings might not be available on all laptops:
Brightness - You can move the slider to temporarily adjust the brightness of your display. To adjust the display brightness settings for your power plan, you need to click the icon to open Power Options.
Volume - You can move the slider to adjust the speaker volume of your laptop, or select Mute check box to turn off the volume temporarily.
Battery Status - This displays how much charge remains on your battery or you can also change or select a power plan from the list for your computer.
Wireless Network - This displays the status of your wireless network connection or it can be used to turn your wireless network adapter on or off.
Screen Rotation - This changes the orientation of your PC screen from portrait to landscape, or vice versa.
External Display - This can be used when you want to connect an external monitor to your laptop, or customize the display settings.
Sync Center - It displays the status of an in-progress file sync, you can start a new sync, setup a sync partnership, or can also change your settings in Sync Center.
Presentation Settings - With this setting you can connect your laptop to a projector. Click Turn on to display a presentation from your computer. With this option laptop stays awake, and system notifications are turned off.
Offline Files:
Using offline files, provides access to files stored in shared network folders even when the network copies are unavailable. This can be done by choosing the network files you want to make available offline, which automatically creates a copy of the network files on your computer. These copies of network files that are stored on your computer are called offline files. Windows will automatically sync your offline files when connected to the network, and open the local copies of the files whenever the network versions are unavailable. In a nutshell, offline files provide access to files on a network share when they are unavailable, provide faster access when you have a slow network connection, and allow you to work with files when away from the network.
By default, offline files are enabled on the following versions of Windows 7: Windows 7 Professional, Windows 7 Enterprise, and Windows 7 Ultimate.
Syncing Offline Files:
This process is automated, however, below is more information about the process:
If you are working offline and make changes to offline files from a network folder, Windows will automatically sync any changes you made to the files the next time you connect to that network folder.
If you are working offline while someone else changes files in a shared network folder, Windows will sync those changes with the offline files on your computer the next time you connect to that network folder. If you have also changed the files since you last connected to the network folder, a sync conflict will occur and Windows will ask you which version you want to keep. You can resolve these and other sync conflicts by using Sync Center.
If Windows encounters a problem when trying to sync offline files between your computer and a network folder (for example, if the network folder you are trying to sync with is unavailable), a sync error will occur.
You can manually sync files - more on this below.
Configuring Offline Files:
To turn offline files off and on, as well as configure other options, follow these steps:
Click Start and enter Offline Files into the search box.
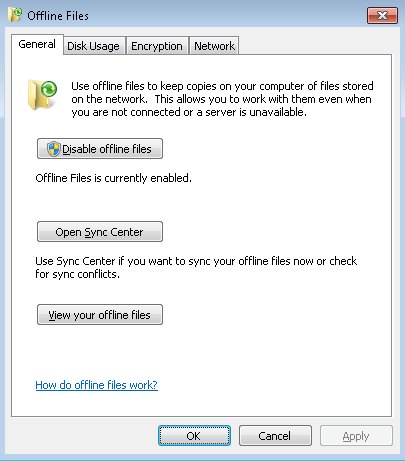
Click Manage Offline Files and you will see the window shown below.
The following describes the various tabs and options available.
General - Turn offline files on and off, open the Sync Center, and view offline files.
Disk Usage - Allows you to view and configure the amount of disk space used by offline files, as well as delete them.
Encryption - This encrypts your files with EFS. This can help safeguard your files in case your computer is ever lost or stolen.
Network - This tab allows allows you to use offline files if a slow connection is discovered and the amount of time between checks. Enabled by default.
A user can make a file available offline by right-clicking the file and then clicking the Always Available Offline option.
Configuring Offline Files With Group Policy:
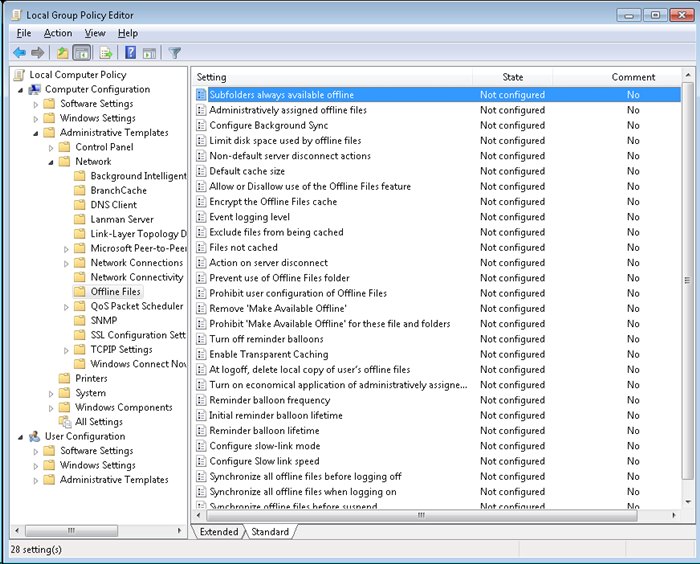
You configure Offline Files through Offline Files policies, located in the Computer Configuration\Administrative Templates\Network\Offline Files node of a Group Policy Object. There are 28 policies that can be configured here.
The following tables explains the group policy settings available for offline files. Note: the bolded titles are the ones you will most likely need to know for the exam.
Group Policy Setting
Description
Subfolders always available offline
Makes subfolders available offline whenever their parent folder is made available offline.
Administratively assigned offline files
Allows the administrator to specify files and folders available offline to users of the computer. To assign a file or folder, click Show and then click Add. In the Type the name of the item to be added box, type the fully qualified UNC path.
Configure Background Sync
This machine-specific policy is in effect when a network folder is determined to be in slow-link mode. For network folders in "slow-link" mode, a sync will be initiated in the background on a regular basis, according to the sync interval and variance settings configured here.
Limit disk space used by offline files
This policy limits the amount of the computer's disk space that can be used to store offline files.
Nondefault server disconnect actions
Determines how computers respond when they are disconnected from particular Offline Files servers. Administrators can enter the name of each server and specify whether users can work offline when disconnected from that server.
Default cache size
Limits percentage of a computers disk space that can be used to store automatically cached offline files. Does not affect disk space available for manually cached offline files.
Allow or Disallow use of the Offline Files feature
Determines whether Offline Files is enabled. Offline Files is enabled by default on Windows XP Professionalbased client computers and is disabled by default on servers.
Encrypt the Offline Files cache
Determines whether offline files are encrypted in the cache on the local computer. Encrypting the offline cache enhances security on the local computer.
Event logging level
Determines which events the Offline Files feature records in the Event Log.
Exclude files from being cached
This policy enables administrators to exclude certain file types (by file extension) from being made available offline.
Files not cached
Allows you to exclude certain types of files from automatic and manual caching for offline use.
Action on server disconnect
Determines whether network files remain available if the computer is suddenly disconnected from the server hosting the files.
Prevent use of Offline Files folder
Disables the View Files button on the Offline Files tab. As a result, users cannot use the Offline Files folder to view or open copies of network files stored on their computer. Does not prevent users from working offline or from saving local copies of files available offline. Does not prevent them from using other programs, such as Windows Explorer, to view their offline files.
Prohibit user configuration of Offline Files
Prevents users from enabling, disabling, or changing the configuration of Offline Files. Administrators can configure other settings as they require, and then enable this setting to prevent users from making any changes, thus locking in a standard configuration.
Remove Make Available Offline
Prevents users from making network files and folders available offline. Removes the Make Available Offline option from the File menu and from all shortcut menus in Windows Explorer. Does not prevent the system from saving local copies of files that reside on network shares designated for automatic caching.
Prohibit Make Available Offline for these files and folders
Allows the administrator to specify files or folders that you do not want available offline. To assign a file or folder, click Show and then click Add. In the Type the name of the item to be added box, type the fully qualified UNC path.
Turn off reminder balloons
Reminder balloons appear above the Offline Files icon in the notification area to notify users when they have lost the connection to a networked file and are working on a local copy of the file. This setting hides or displays reminder balloons.
Enable transparent caching
Transparent Caching optimizes bandwidth consumption on WAN links and provides near local read response times for mobile users and branch office workers that are accessing network files and folders that are not explicitly made available offline. The greatest benefits of Transparent Caching are realized when BranchCache is deployed.
At logoff, delete local copy of users offline files
Deletes local copies of the users offline files when the user logs off. Caution: Files are not synchronized before they are deleted. Any changes to local files since the last synchronization are lost.
Turn on economical application of administratively assigned offline files
If you enable or do not configure this policy setting, only new files and folders in administratively assigned folders are synchronized at logon. Files and folders that are already available offline are skipped and are synchronized later. If you disable this policy setting, all administratively assigned folders are synchronized at logon.
Reminder balloon frequency
Determines how often reminder balloon updates appear (in minutes).
Initial reminder balloon lifetime
Determines how long the first reminder balloon for a network status change is displayed (in seconds).
Reminder balloon lifetime
Determines how long updated reminder balloons are displayed.
Configure slow link mode
This policy setting enables computers to use the slow-link mode of Offline Files (it is enabled by default for computers running Windows 7. This policy also controls when client computers running Windows 7 or Windows Server 2008 R2 transition to the slow-link mode.
Configure slow link speed
Configures the threshold value at which the Offline Files component considers a network connection to be slow, to prevent excessive synchronization traffic.
Synchronize all offline files before logging off
Determines whether offline files are fully synchronized when users log off.
Synchronize all offline files when logging on
Determines whether offline files are fully synchronized when users log on.
Synchronize all offline files before a suspend
Determines whether offline files are fully synchronized before a4:17 PM 6/26/2011 computer (such as a portable computer) enters suspend mode.
Resolving Sync Conflicts:
Sync conflicts can occur when changes are made to a file available offline both on the file server and within the local cache. For example, Bob makes a file called sales.doc available offline. Bob then makes changes to the file on his laptop while at home (offline file). Meanwhile, Joe works on sales.doc at the office. When Bob reconnects his laptop to the network, Sync Center notifies him that there is a sync conflict.
Windows 7 offers the Sync Center control panel for resolving these conflicts. To do this, click on View Sync Conflicts in the left pane of the Sync Center. This will display a list of files that have experienced a conflict. Click on Resolve and you will be presented with the following options:
Keep the local version The version of the file that is stored on the local computer will be kept. This version overwrites the changed version of the file on the file share.
Keep the server version The version of the file that is stored on the file share is kept, and the changes made to the local version are lost.
Keep both versions The version on the local computer is renamed and then saved to the file share. The version of the file on the file share keeps the original name.
Power Management:
A power plan (formerly known as a power scheme in earlier versions of Windows) is a collection of hardware and system settings that manages how your computer uses and conserves power. You can use power plans to save energy, maximize system performance, or balance energy conservation with performance.
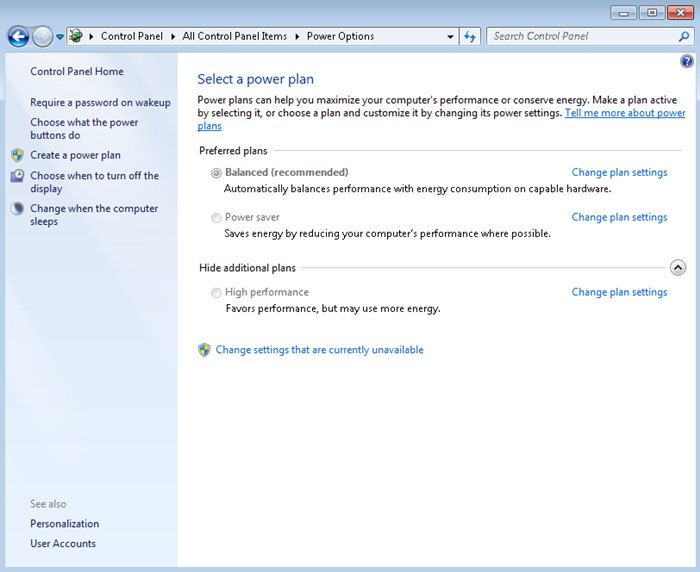
Windows 7 includes three default power plans as follows:
Balanced - Offers full performance when you need it and saves power during periods of inactivity.
Power saver - Saves power by reducing system performance. This plan can help mobile PC users get the most from a single battery charge.
High performance - Maximizes system performance and responsiveness. Mobile PC users might notice that their battery doesnt last as long when using this plan.
To modify one of the existing plans follow the steps below:
Click the Start button, then Control Panel, and then System and Security. Next click Power Options.
Click Change plan settings next to the plan that you want to change.
Choose the display and sleep settings that you want to use when your computer is running on battery and when its plugged in.
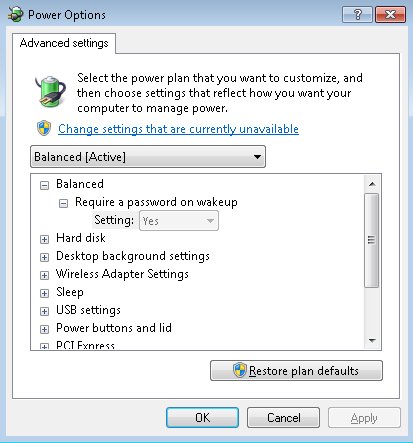
To change additional power settings, click Change advanced power settings. This will allow you to change settings for specific hardware.
You can also create a new plan following these steps:
Click the Start button, then Control Panel, and then System and Security. Next click Power Options.
Click Create a plan in the left pane.
Select the plan that is the closest to the type of plan that you want to create. Type a name for the plan and then click Next.
Choose the display and sleep settings that you want to use when your computer is running on battery and when its plugged in and then click Create.
To further configure your new plan, follow the steps above for modifying an existing plan.
Sleep and Hibernate:
Sleep is a power-saving state that allows a computer to quickly resume full-power operation (typically within several seconds) when you want to start working again. Putting your computer into the sleep state is like pausing a DVD player: The computer immediately stops what its doing and is ready to start again when you want to resume working.
Hibernation is a power-saving state designed primarily for laptops. While sleep puts your work and settings in memory and draws a small amount of power, hibernation puts your open documents and programs on your hard disk, and then turns off your computer. Of all the power-saving states in Windows, hibernation uses the least amount of power. On a laptop, use hibernation when you know that you wont use your laptop for an extended period and wont have an opportunity to charge the battery during that time.
Hybrid sleep is designed primarily for desktop computers. Hybrid sleep is a combination of sleep and hibernateit puts any open documents and programs in memory and on your hard disk, and then puts your computer into a low-power state so that you can quickly resume your work. That way, if a power failure occurs, Windows can restore your work from your hard disk. When hybrid sleep is turned on, putting your computer into sleep automatically puts your computer into hybrid sleep. Hybrid sleep is typically turned on by default.
These settings can also be configured from the Power Options control panel.
Exporting Power Plans:
Powercfg.exe is a command line utility that can perform most of the power configuration tasks covered above. It can also do a couple of things that can't be done through the GUI such as exporting a power plan to be migrated to another computer. To do this, follow these steps:
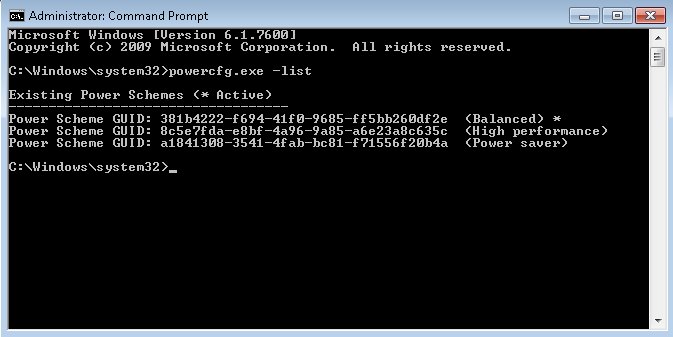
At an elevated command prompt, type powercfg.exe list. Record the GUID assigned to the plan you wish to export as you will need it later.
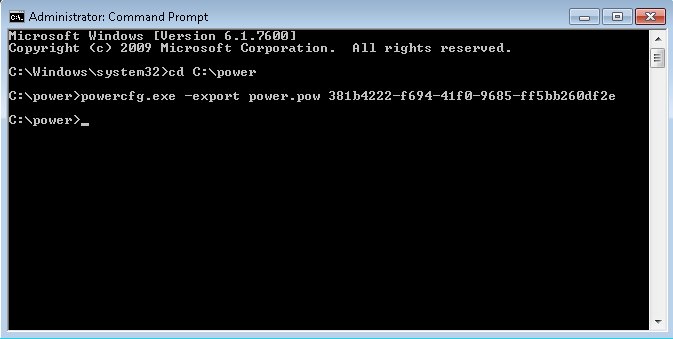
Create a directory to save the exported configuration. In this example, we are using C:\power. Change into this directory by typing cd C:\power.
Enter the command powercfg.exe export [filename].pow [GUID], where [filename] is the name of the exported file to be saved and [GUID] is the GUID of the power plan you are trying to export.
In this case, the file power.pow was saved to our C:\power folder. This file can be migrated to another computer and imported using the following command: powercfg.exe -import [path to file]\power.pow.