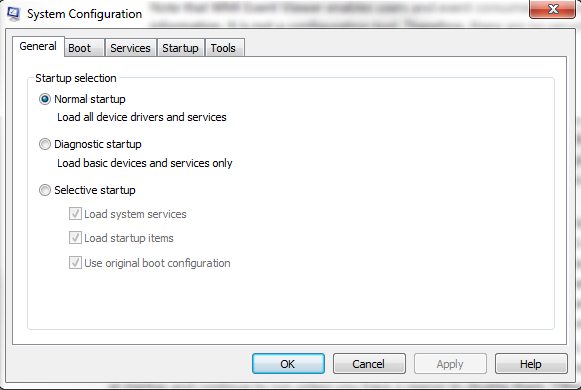
The system configuration tool is mainly used for troubleshooting startup issues and can be accessed by entering msconfig in the Start menu searchbox.
System Configuration can disable or re-enable software, device drivers and Windows services that run at startup, or change boot parameters. Stopping services and/or applications from running at startup can not only solve startup issues, it can improve overall performance by preventing unnecessary items from automatically running and consuming resources.
From the tools tab, you can launch many other Windows 7 built-in troubleshooting tools.
Performance Options:
To access performance options, follow these steps:
Click Start, then Control Panel.
Next, click System and Security.
Click System.
Click Advanced System Settings in the left pane.
Click Settings in the Performance section to display the Performance Options dialog box.
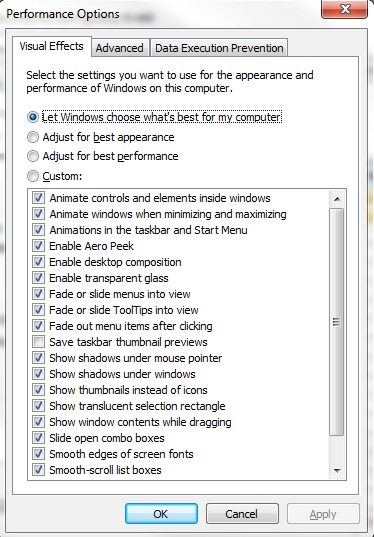
The performance options tool has a couple of noteworthy settings to look at. The visual effects tab allows you to configure the effects used by Windows. If Windows is running slowly, you can speed it up by disabling some of its visual effects. By default, Windows chooses what it thinks is best, but this can be changed to Adjust for best appearance (slower and prettier) or Adjust for best performance (faster and uglier). The other option is to select Custom and choose the specific effects to turn off. There are 20 visual effects you can control, such as the transparent glass look, the way menus open or close, and whether shadows are displayed.
The Advanced tab of the Performance Options dialogue box has two sections; Processor Scheduling and Virtual Memory (discussed in the next section below).
In most cases, a Windows 7 computer will be used to run programs for a user, however, in some cases, a workstation may be dedicated to a particular tasks such as a print server. The default processor scheduling setting is set so that user programs are given a higher priority than those running in the background. However, if you have a Windows 7 workstation that is dedicated to a specific task, such as monitoring an assembly line or acting as a print server, you can have Windows share processor resources equally between background and foreground programs by checking the Background Services radio button.
Configuring Virtual Memory:
Manually configure virtual memory usage by completing the following steps:
Click Start, then Control Panel.
Next, click System and Security.
Click System.
Click Advanced System Settings in the left pane.
Click Settings in the Performance section to display the Performance Options dialog box.
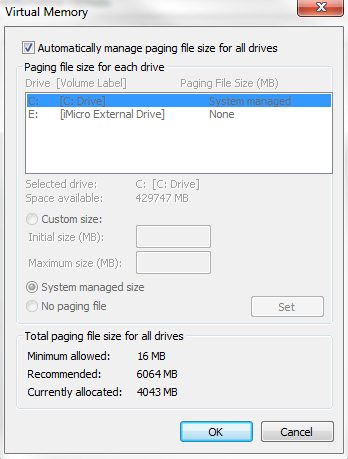
Click the Advanced tab, and then click Change to display the Virtual Memory dialog box.
Uncheck the Automatically manage paging file size for all drives checkbox.
In the list of drives, click the drive that contains the paging file you want to change.
Click Custom size, and enter a new size in megabytes in the Initial size (MB) or Maximum size (MB) boxes.
Click Set, and then click OK.
If you would like to change the location of your paging file, follow steps 1-8 above and then the following:
Click the No paging file radio button.
Next, select the hard drive you would like to store your paging file on and choose System managed size.
Click OK. Changes won't take effect until you restart your computer.
ReadyBoost:
Windows 7 supports Windows ReadyBoost. This feature uses external USB flash drives as a hard disk cache to improve disk read perfor¬mance. Supported external storage types include USB thumb drives, SD cards, and CF cards. Since ReadyBoost will not provide a perfor¬mance gain when the primary disk is an SSD, Windows 7 disables ReadyBoost when reading from an SSD drive.
ReadyBoost offers the most improvement in the following situations:
You have a slow hard disk drive. Computers with a primary hard disk Windows Experience Index (WEI) subscore lower than 4.0 will see the most improvement.
The flash storage provides fast, random, non-sequential reads. Sequential read speed is less important.
The flash storage is connected by a fast bus. Typically, USB memory card readers are not sufficiently fast. However, connecting flash memory to an internal memory card reader might provide sufficient performance.
External storage must meet the following requirements:
Capacity of at least 256 MB, with at least 64 kilobytes (KB) of free space.
At least a 2.5 MB/sec throughput for 4-KB random reads
At least a 1.75 MB/sec throughput for 1-MB random writes
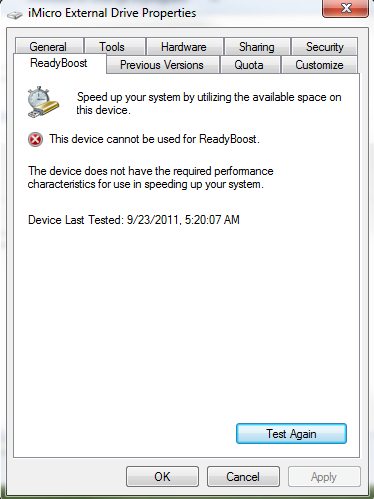
The easiest way to tell if a drive meets the specs is to test it. If the device is not compatible, you will see this:
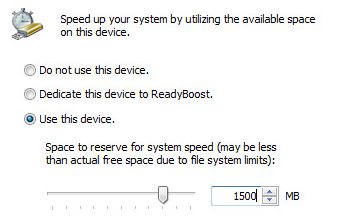
You can configure ReadyBoost by right-clicking the device in Explorer, selecting Properties, and then clicking the ReadyBoost tab. You can also get here via the Autorun dialogue box when the device is connected if your device is ReadyBoost capable. The only configuration options are to enable ReadyBoost on the drive and set the space reserved for the cache.
The minimum you can reserve is 256 MB. Larger caches can improve performance, but the ReadyBoost cache cannot be greater than 4 GB on a FAT32 file system or greater than 32 GB on NTFS. For best results, the drive should have available space 2x greater than the amount of RAM in the computer.
ReadyDrive:
ReadyDrive improves performance on mobile computers with hybrid drives - a drive that uses both flash RAM and physical drive for storage. Because flash RAM is faster than a physical disk, Windows 7 can write data (and changes to data) to flash memory first and then periodically sync to the physical disk. This reduces the spinning of the physical drive, saves battery power, provides faster startup, and faster resuming from sleep/hibernation. ReadyDrive is enabled by default on mobile computers with hybrid drives.
Processor Affinity:
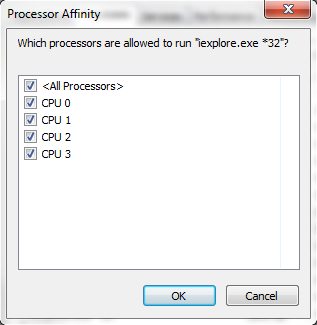
If your computer has more than one processor, you can configure the affinity of your processes to use particular processors. By default, processes that install on a multiprocessor computer are set to use whatever processor is available. If an additional processor is added later to a computer, however, processes might require configuration so that they use the new processor. If Task Manager shows that one processor on a multi-processor computer is heavily used and the others are not, you should change the affinity of your intensive processes use all processors. To find out which process or processes are being used by a service, right-click the service in the Services tab of Task Manager and click Go To Process. This selects the Processes tab and highlights the relevant process. To set the affinity for a process, right click on it and select Set Affinity. Then check the processors you wish for this process to use.
Windows Performance Toolkit:
For the exam you may need to know how to use the Windows Performance Toolkit (WPT) which is part of the Windows SDK for Windows 7. This kit contains the following tools:
Trace Capture, Processing, and Command-Line Analysis tool (Xperf.exe)