Microsoft Internet Explorer (IE) is the most common browser available because it comes with every version of Windows. Windows 7 includes Internet Explorer 8.0, which has new functionality while reducing online risks. Some of the new features of IE 8 include:
Tabbed browsing that enables you to open multiple webpages in a single browser window.
The Instant Search box allows you search the Web from the Address bar.
You can delete your temporary files, cookies, webpage history, saved passwords, and form information from one place.
Printing now scales webpages to fit the paper youre using.
The Zoom feature lets you enlarge or reduce text and images.
InPrivate, helps protect privacy by preventing ones browsing history, temporary Internet files, from data, cookies, usernames, and passwords from being retained by the browser.
The SmartScreen Filter offers protection from phishing sites.
When a site or browser add-on causes a tab to crash, only that tab is affected. In many cases, IE can recover the tab.
.
Configuring Browsing History:
Click on Tools on the explorer tool bar in the upper right of the page.
Click Internet Options in the drop-down menu. This opens the Internet Options dialog window.
Click on the General tab.
Go to the Browsing History section.
Click the Settings button. This opens the Temporary Internet Files window.
Here you can modify settings such as when IE checks for new versions of cached pages, the location of the temporary internet files, the size of the temporary internet files folder, and the number of days that IE should keep visited pages in history.
Click OK after making the appropriate selections.
Security Zones:
Internet Explorer assigns all websites to one of four security zones: Internet, Local intranet, Trusted sites, or Restricted sites. The zone to which a website is assigned specifies the security settings that are used for that site.
The following table describes the four Internet Explorer security zones.
Zone
Description
Internet
The level of security set for the Internet zone is applied to all websites by default. The security level for this zone is set to Medium High (but you can change it to either Medium or High). The only websites for which this security setting is not used are those in the Local intranet zone or sites that you specifically entered into the Trusted or Restricted site zones.
Local intranet
The level of security set for the Local intranet zone is applied to websites and content that is stored on a corporate or business network. The security level for the Local intranet zone is set to Medium (but you can change it to any level).
Trusted sites
The level of security set for Trusted sites is applied to sites that you have specifically indicated to be ones that you trust not to damage your computer or information. The security level for Trusted sites is set to Medium (but you can change it to any level).
Restricted sites
The level of security set for Restricted sites is applied to sites that might potentially damage your computer or your information. Adding sites to the Restricted zone does not block them, but it prevents them from using scripting or any active content. The security level for Restricted sites is set to High and can't be changed.
Configuring Internet and Local Internet Security Settings:
Select the Security tab at the top of the Internet Options dialog window.
Change the security level from IEs default setting of Medium-High, by adjusting the slide bar upward or downward to your desired setting.
Click on the Custom Level button if you would like to make the adjustment manually.
Click OK when finished.
Adding Trusted Sites:
Click the Trusted Sites icon from the security tab.
Click on the Sites button.
Enter the links to any sites that you know for sure are not a threat.
Click the Add to enter each link.
Click Close.
Adding Restricted Sites:
Click the Restricted Sites icon from the security tab.
Click the Sites button.
Enter the links to any sites that you know for sure will damage your computer.
Click Add to enter each link.
Click Close.
Click Apply.
Managing Cookies:
Websites use cookies to offer a personalized experience to users and to gather information about website use. Many websites also use cookies to store information that provides a consistent experience between sections of the site, such as a shopping cart or customized pages. With a trusted website, cookies can enrich your experience by allowing the site to learn your preferences or allowing you to skip having to sign in every time you go to the website. Disabling cookies can greatly reduce the ease of use on many sites, however, some cookies, such as those saved by banner ads, might put your privacy at risk by tracking sites you visit.
Internet Explorer provides many different ways to control the cookies that are stored on your computer. You can block or allow cookies or you can choose the specific sites that you'll accept cookies from. When you make these sorts of changes, the cookies that are already stored on your computer will not be affected. For that reason, you might want to delete the cookies already stored on your computer.
IE provides the ability to completely turn off cookies, although this is not recommended in most cases. Another approach is to manually configure which sites you will accept cookies from. This can be done as follows:
Select the Privacy tab at the top of the Internet Options dialog window
Click the Sites button. This opens the Per Site Privacy Actions window.
Enter the links to sites that you want to allow or block from using cookies on your Computer.
Click the Block or Allow button as desired to add each link.
Click OK.
Configuring Internet Explorer to use a Proxy:
Select Tools, then select the Internet Options dialog window.
In the Internet Options window, click on the Connections tab.
Click LAN Settings and enable the checkbox for Use a proxy server for your LAN.
In the Address field, type in 127.0.0.1 and in the Port field type in 8081.
Enble the check-box for Bypass proxy server for local addresses.
Click Advanced. In the Do not use proxy server for addresses beginning with: field, type the addresses which you want to to view some sites directly and not through the proxy.
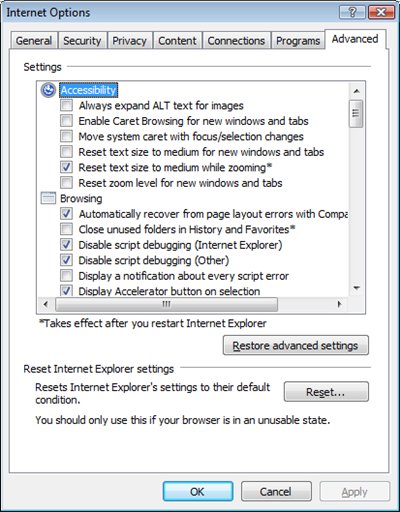
Advanced Settings:
The advanced tab of the Internet Options dialogue box has several important security features including:
Checking for server and publisher certificate validity, or certificate address mismatches. (Default is checked)
Checking for signatures on downloaded programs. (Default is checked)
Emptying the temporary internet files folder when IE is closed. (Default is unchecked)
Enabling the SmartScreen Filter which detects phishing sites. (Default is checked)
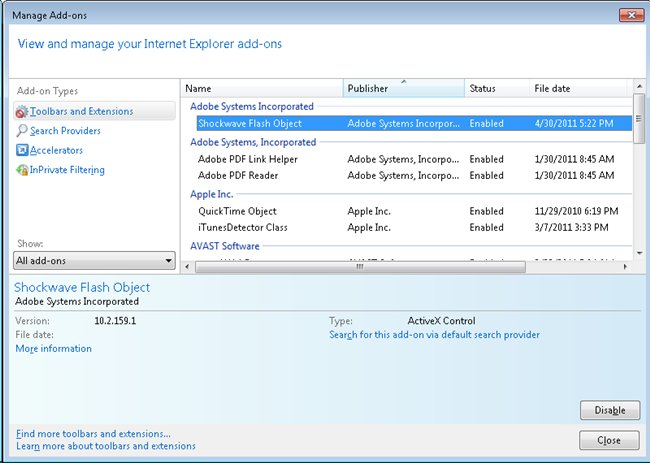
Managing Add-Ons:
Add-Ons, also known as browser plug-ins, are software programs that add functionality to IE. There are four basic add-on types supported by IE:
Search providers
Toolbars and extensions
Accelerators
InPrivate filtering
While add-ons can extend the functionality of your browser, they are often responsible for conflicts, crashes, and security breaches. Fortunately, IE allows you to manage add-ons in a way that can help you troubleshoot which object is causing the problem and then take necessary actions. To manage add-ons, follow these steps:
Click the Tools button and then click Manage Add-ons.
In the Show drop-down menu, select one of the following options:
To display a complete list of the add-ons that reside on your computer, click All Add-ons.
To display only those add-ons that were needed for the current webpage or a recently viewed webpage, click Currently loaded Add-ons.
To display add-ons that were pre-approved by Microsoft, your computer manufacturer, or a service provider, click Add-ons that run without permission.
To display only 32-bit ActiveX controls, click Downloaded Controls.
Selecting an add-on will allow you to view more information and/or disable it. Disabling add-ons can help you determine which one is causing problems.
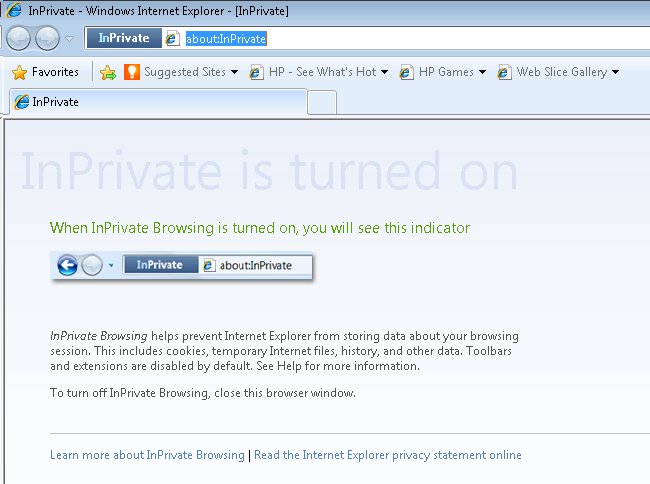
InPrivate Browsing:
InPrivate Browsing enables you to surf the web without leaving a trail in Internet Explorer. This helps prevent anyone else who might be using your computer from seeing where you visited and what you looked at on the web.
To turn on InPrivate Browsing, follow these steps:
From the Safety menu, select InPrivate Browsing.
The browser's appearance will change to that shown in the image below:
When you start InPrivate Browsing, Internet Explorer opens a new browser window. The protection that InPrivate Browsing provides is only in effect during the time that you use that window. You can open as many tabs as you want in that window, and they will all be protected by InPrivate Browsing. However, if you open another browser window, that window will not be protected by InPrivate Browsing. To end your InPrivate Browsing session, close the browser window.
While you are surfing using InPrivate Browsing, Internet Explorer stores some informationsuch as cookies and temporary Internet filesso that the webpages you visit will work correctly. However, at the end of your InPrivate Browsing session, this information is discarded.
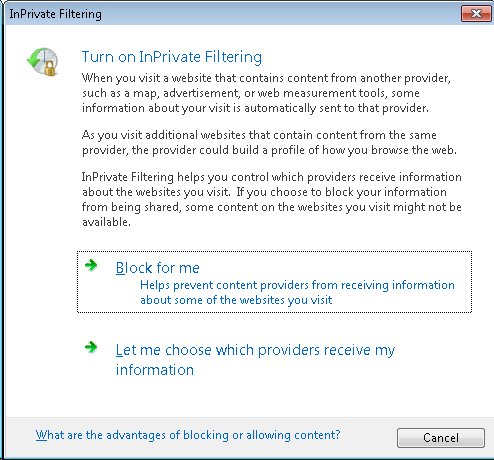
InPrivate Filtering:
InPrivate Filtering helps prevent website content providers from collecting information about sites you visit. Many webpages use contentsuch as advertisements, maps, or web analysis toolsfrom websites other than the one you are visiting. These websites are called content providers or third-party websites. When you visit a website with third-party content, some information about you is sent to the content provider. If a content provider offers content to a large number of the websites you visit, the content provider could develop a profile of your browsing preferences. Profiles of browsing preferences can be used in a variety of ways, including for analysis and serving targeted advertisements.
Usually this third-party content is displayed seamlessly, such as in an embedded video or image. The content appears to originate from the website you originally went to, so you may not know that another website might be able to see where you are surfing. Web analysis or web measurement tools report website visitors' browsing habits, and are not always obvious to you. While these tools can sometimes appear as visible content (such as a visitor counter, for example), they are often not visible to users, as is often the case with web beacons. Web beacons are typically single-pixel transparent images whose sole purpose is to track website usage, and they do not appear as visible content.
InPrivate Filtering works by analyzing web content on the webpages you visit, and if it sees the same content being used on a number of websites, it will give you the option to allow or block that content. You can also choose to have InPrivate Filtering automatically block any content provider or third-party website it detects, or you can choose to turn off InPrivate Filtering.
To turn on InPrivate Filtering, follow these steps:
From the Safety menu, select InPrivate Filtering.
Next, you will be able to choose to have IE decide which content to block, or manually choose which content providers to block.
If you choose to turn on InPrivate Filtering, some content on websites may not be available.