Program compatibility is a mode in Windows that lets you run programs written for earlier versions of Windows. Most programs written for Windows Vista also work in Windows 7, but some older programs might run poorly or not run at all.
If an older program doesn't run or install correctly, the first, and easiest, thing to try is the Program Compatibility troubleshooter. It can automatically detect and fix common problems that prevent older programs from installing or running correctly.
Open the Program Compatibility troubleshooter by doing the following:
Click the Start button, then Control Panel.
In the search box, type troubleshooter, and then click Troubleshooting.
Under Programs, click Run programs made for previous versions of Windows. As an alternative to these first 3 steps, you can right click on the program's icon or shortcut and select Troubleshoot Compatibility.
If you click on Advanced, you can opt to run as administrator which may find more issues, and you can choose to have Windows automatically fix problems.
Click Next and Windows searches for issues.
You will be presented with a list of applications. Choose the one you are having problems with and click Next
You can now choose to try running the program using Microsoft's changes and see if the problem is solved. If the problem is solved, you can elect to apply the changed. If it does not solve your problem, you may choose troubleshoot program which will begin a troubleshooting wizard.
Don't use the Program Compatibility troubleshooter on older antivirus programs, disk utilities, or other system programs, because using outdated programs of this type might cause data loss or create a security risk.
Instead of using the wizard above, you can manually set the compatibility mode as follows:
Right click on the program's icon or setup file (typically setup.exe) and select Properties.
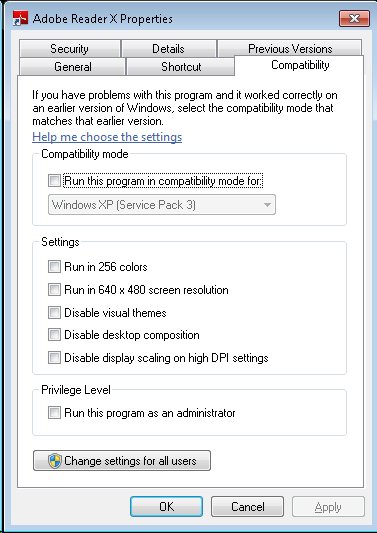
In the window that appears, click the Compatibility tab as shown below.
If you want to run the application in a particular operating system mode, click the Run this program in compatibility mode for: checkbox and then select the operating system from the drop-down menu below.
On this screen, you can also troubleshoot issues by trying 1 or more of the checkboxes that affect display properties.
Internet Explorer Compatibility:
Typically when Microsoft releases a new version of IE, some web pages no longer display properly. If Internet Explorer recognizes a webpage that is not compatible, the Compatibility View icon will appear on the Address bar as shown below.
Clicking on this button will switch IE to compatibility view for this page. Clicking the button again, will turn it off. The same goal can be accomplished by clicking on Compatibility View from the tools menu. If the option is grayed out, it means that IE has not detected any compatibility issues with the web page.
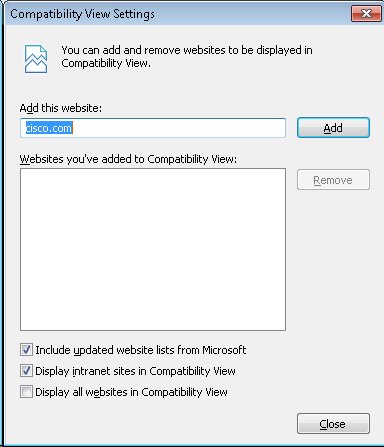
There are a few IE compatibility settings that can be modified by clicking on the Tools menu and selecting Compatibility View Settings.
Shims:
As the Windows operating system evolves from version to versionchanging to support new technology, incorporate bug fixes, and implement a modification in strategychanges to the implementation of some functions may affect applications that depend on them. Because of the nature of software, modifying the function again to resolve this compatibility issue could break additional applications or require Windows to remain the same regardless of the improvement that the alternative implementation could offer. We can circumvent this possibility by placing branches directly in the source code for Windows, but doing so presents a long-term challenge for the serviceability and reliability of the Windows operating system. Using the Shim Infrastructure, however, you can target a specific application fix but only for a particular application (and typically, for particular versions of that application), with these fixes housed outside the core Windows functions and maintained separately.
Deploying a custom shim database to users requires the following two actions:
Placing the custom shim database (*.sdb file) in a location to which the users computer has access (either locally or on the network).
Calling the sdbinst.exe command-line utility to install the custom shim database locally.