Introduction:
In this section, we will take a look at some of the steps in installing and configuring networks. There are several things to Keep in mind while reading this section as follows:
A+ technicians only handle minor things with regards to networking, so we will not go very in depth on this.
The configuration examples below are for Windows XP. The steps involved will likely vary in other operating systems.
In Windows, there are a number of different ways to access a particular window or screen. Many of the windows below can be accessed using the control panel and other methods. This tutorial only shows one possible way to access each of these screens. You should know the other methods as well.
Network Devices:
A network is composed of computers, servers, printers, and other devices. We have already discussed cabling and the types of connectors used on networks, but what do they connect to? The computer, printer, etc. (also known as a client) will have a network interface card (NIC) that one end of the cable plugs into. The NIC can be built into the motherboard or can be an expansion card. In either case, it will need to have the correct driver loaded like any other expansion card.
On most Ethernet networks, there are hubs or switches that serve as the central location that all of the clients plug in to. On very small Ethernet networks, the devices plug into a hub. On larger networks, there is usually a wiring closet with at least one switch. Often, the network devices plug into a wall jack that is wired to the switches in the wiring closet.
On even larger networks, routers are often needed to divide the network into different segments. Routers are also used as a gateway to the outside world (i.e. connection to ISP).
Dial-up Connection:
This type of connection is being used less frequently all the time with the emergence of faster and better broadband options. However, you may still need to know how to deal with this type of network connection. Dial-up and ISDN connection use a modem which converts digital signals from your computer to analog for transmission over phone lines. On the receiving end is another modem which converts the signal back to digital. From a physical standpoint, setting up this type of connection is as simple as connecting a phone cord from your computer to the wall jack.
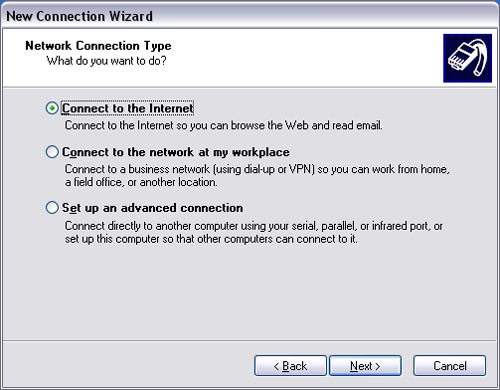
The easiest way to configure this type of connection is to right click on My Network Places and select Properties. Next, click on Create a New Connection which will launch the New Connection Wizard. This wizard can be used to set up a wide variety of connection types including the ones below that are described manually. Once we complete the wizard, a new icon appears in our Network Connections window as shown below.
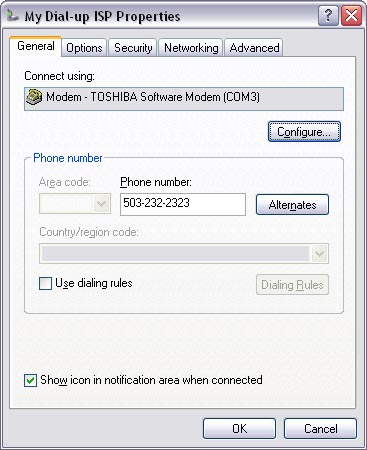
The dial-up icon was not there previous to completing the wizard. Now we can go in and configure our dial-up connection. To do this, right click on the dial-up connection icon and select Properties. You should now see a window like below:
From here you can configure the modem itself, the connection options, protocols, security, internet connection sharing (discussed in a later section), and other settings.
Local Area Network Connection:
It should be clear by now that there are a wide variety of network types, connections, and protocols. Too many for us to cover all of the possibilities here, however, we will go through a couple of examples of very common scenarios.
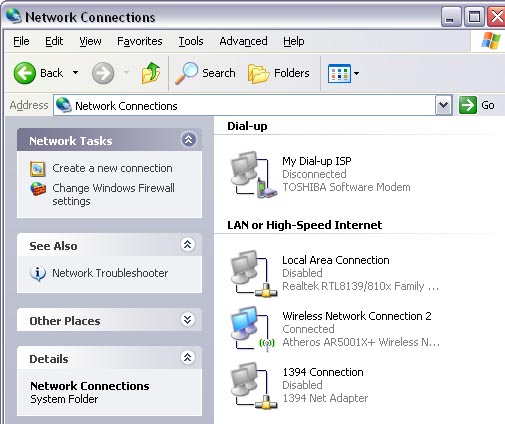
Once your client is physically plugged into the network, you then need to set things up on the software side. In never versions of Windows, this has become pretty simple. For our first example, we are going to set up a connection on a LAN. To get started, right click on the "My Network Places" icon on the desktop and select "Properties". This will bring up the network connections dialog box shown below.
As you can see in the image, this window lists your current network connections and their status. Here we have a LAN connection that does not have a cable plugged in, a wireless connection that is currently connected, and a 1394 net adapter which is for a firewire network connection.
On the left side, you should see "Create a new connection". When you click this, Windows launches the Network Connection Wizard which allows you to configure your cable or DSL connection, dial-up or VPN to a corporate network, and peer-to-peer connections such as serial or infrared.
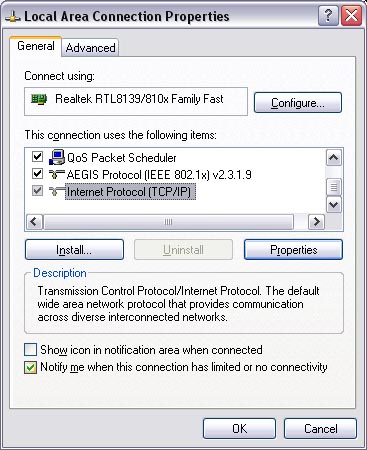
After you have completed the wizard, your new connection should appear in the Network Connections dialogue box. Now the network needs to be configured. To do this, right click on your new connection and click "properties". You will then see a window that looks like this:
From here, you can configure your network card (NIC) by clicking on the configure button, although in most cases nothing needs to be done here. This will take you to the same place as viewing the NICs properties in Device Manager.
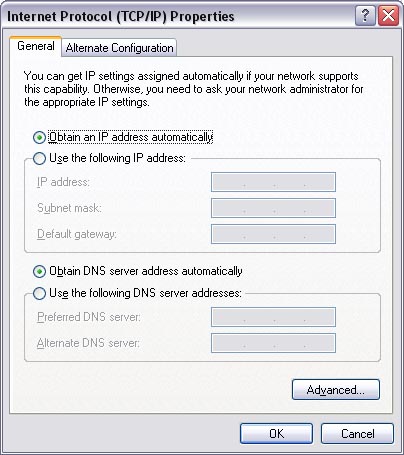
Next we may need to configure our protocol(s). In this case, our network is using TCP/IP, however if you need to use a protocol that isn't there, click on the "Install" button. This will bring up a list of protocols that can be installed. If you still don't see the one you need, then you probably need a disk that contains the installation files for that protocol. This should be very rare. In any event, first highlight the "Internet Control Protocol (TCP/IP)" and click the "properties" button and you will see the screen below.
If our network has a DHCP server, then we probably don't need to configure anything at all and should leave the "Obtain an IP address automatically" radio button selected. Checking the other radio buttons will allow you to manually enter IP address, subnet mask, default gateway, and DNS Servers. Once this is done, you should have a connection to your network.
Shared Connection With ICS:
In the above example, we connected to an existing LAN. What if we want to connect a single computer to a DSL or cable connection? This is as simple as connecting the NIC on the computer to the DSL router or cable modem and following the configuration instructions from the broadband vendor. But, what if we need to connect a few computers to a broadband connection? One option is to get a router and run NAT - the other is to let Windows solve the problem. Windows 2000 and XP include a service called Internet Connection Sharing (ICS). This allows one computer to be connected to the internet, and the others to share the connection. One caveat of this configuration is that the host computer must have 2 network cards installed unless you are using dial-up - one to connect to the cable modem or DSL router and the other to connect to the LAN.
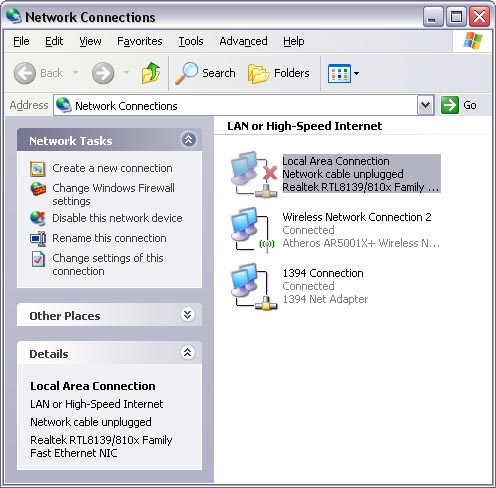
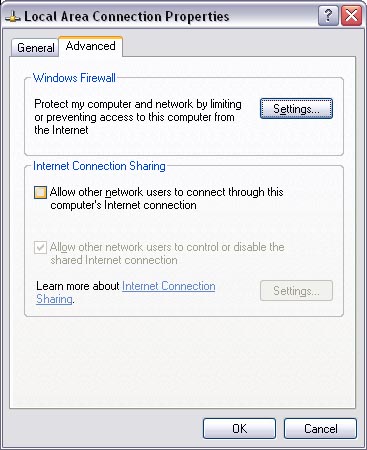
To get started, you must have 2 connections in your Network Connections. First, right click on the cable modem or DSL connection and select properties. This will bring up the Local Area Connection Properties window that we saw in our last connection and seen below:
Next, you need to click on the advanced tab. Here you simply check the box that says, "Allow other network users to connect through this computer's internet connection".
Next, we need to configure the clients. This is as easy as going to our TCP/IP properties window shown earlier and making sure that the connection is set to use DHCP. In other words make sure that the "Obtain an IP address automatically" radio button is selected and all other fields are clear.
Wireless Connection:
The next type of connection we are going to look at is a wireless connection. Wireless connections are somewhat plug and play and it is fairly easy to set up a basic connection. The first step is to connect the wireless access point (WAP) to a computer using the ethernet cable that came with the WAP. Almost all WAPs have an internal web page that can be viewed by entering the default IP address that it is programmed with. This is usually something like 192.168.1.1 and the default username is usually something like "admin" and "password" respectively. Check the documentation that comes with the WAP for this information. Once logged into the web page, you can configure a wide variety of settings for the access point including IP settings, SSID, wireless channel, WEP and WPA security, and more. The first thing you should do is change the SSID to a unique identifier for your network. You may need to change the IP settings depending on your situation. Next, it is a good idea to set up security. WPA2 is the best available, although some access points only support WPA. After all of the settings are configured, connect the WAP to the network as appropriate.
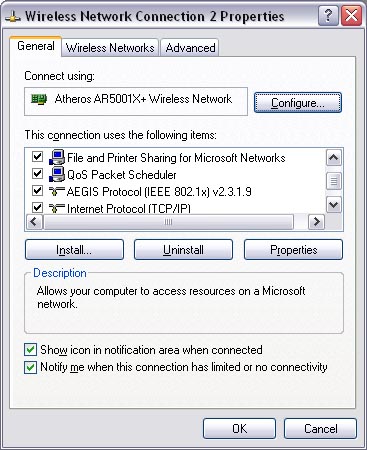
Now, we need to configure our wi-fi client to connect to the access point. Windows includes a wizard that simplifies this process, but we are going to look at the manual method. To get started, first right click on My Network Places and select properties. This will bring up the Network Connections window that we saw in previously discussed connections. There should be a wireless connection icon that will appear after you install the wireless network adapter on the computer. Right click on this icon and select properties. This will bring up the Wireless Network Connection Properties window that is very similar to the Local Area Connection Properties window we saw earlier, and you can configure your TCP/IP properties for your wireless connection in the same manner described earlier.
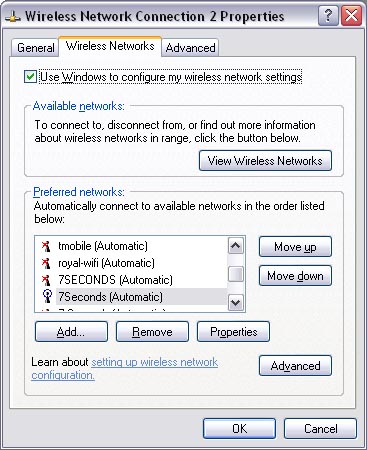
The major difference between this window and the Local Area Connection Properties window is that this one has a Wireless Networks tab that when clicked brings up this window.
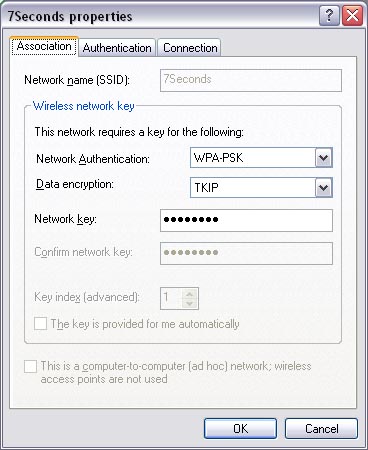
The next step is to select your preferred wireless network. Your network will show up using the SSID that you configured on the WAP earlier. Once selected, click the properties button which will bring up this window:
In this window, you can configure your security settings depending on what selections you made when configuring the WAP. After all of these steps, you should be able to connect to your wireless network. You can check your connection's "health" by going to My Network Places and double-clicking on the wireless network connection icon which brings up this window.
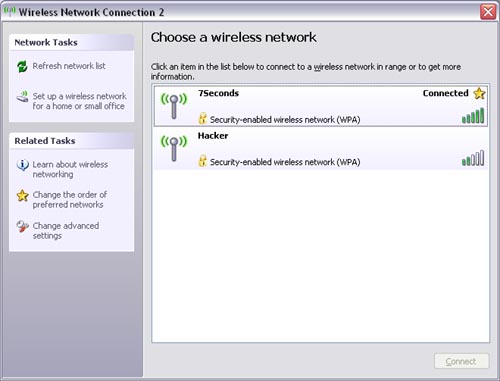
This shows your signal strength, connection speed, and other information that is useful for troubleshooting when there is a problem. If you want to see which networks are available to connect to, simply click on the View Wireless Networks button which brings up this window:
Here you can see which wireless networks are available to connect to and manually connect to them.