In Microsoft Windows XP Professional, you will find one of
three different accounts in use on any given system.
Local
user accounts allow you to log on to the local system and
access resources there. If you needed to access any type
of resource beyond the local system, you would need to
provide additional credentials in most cases. Local
accounts authenticate to the local security database.
Domain
user accounts allow you to log on to the domain the user
account belongs to in order to access network resources. You may be
able to access resources in other domains depending on how
the trust relationships are defined or if any
modifications have been made to them. Domain accounts
authenticate to a domain controller and to the domain
security database.
Built-in user accounts allow you to perform administrative
tasks on the local system and sometimes they can access local or
network resources, depending on their configuration on the
network. This too, is dependant on how trust
relationships are defined or if any modifications have
been made to them. The only two accounts created by
default on a stand alone Windows XP Professional clean
installation are Administrator and Guest.
[NOTES FROM THE FIELD] - The built-in Administrator
account is enabled by default and cannot be deleted from the
system. The name of the account as well as the password can
be changed, however, and this is a recommended best
practice. It is also recommended that the default
Administrator account never be used or used as infrequently
as possible and only when tasks need to be performed at an
Administrative level. If there is ever more than one
Administrator on a workstation, each one should have an
account created for their use. In the event that you need to
log administrative events, this would be easier if there
were a number of different administrator accounts created
rather than a single one.
The Guest account also cannot
be deleted from the system, however it is DISABLED by
default and unless there is some required operational need
it should stay disabled. The only "need" for the Guest
account would be a kiosk type terminal in a lobby of an
office building or hotel and in that event it could be used.
If there is ever a short time need to grant access to a
temporary user to a system it's is always worth the
"aggravation" to create an account.
Using the Local Users and Groups Snap-in
You would normally need to be a local administrator to perform most
system configuration functions (even just taking a look at
the current configuration settings) on a Windows XP
Professional system, and in some cases, there may be a local
policy set by some other administrator or if your system is
in a Domain, a Domain policy setting, which may prevent you
from performing some actions.
To manage local users and groups you can use the Local Users and
Groups MMC and you can access this tool a number of
different ways.
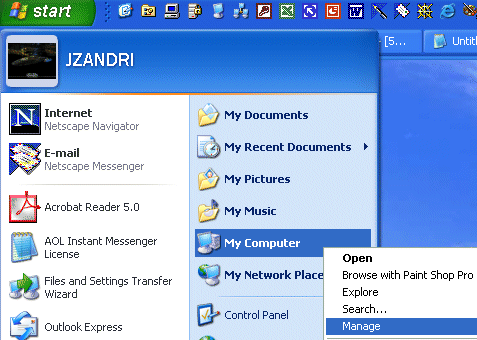
One way is to select Start, right-click My
Computer, and then click Manage, which will open the
Computer Management MMC. Under the System tools icon,
click Local Users and Groups to open the Local Users and
Groups MMC.
You can also type compmgmt.msc in the RUN box or from a command line
to launch the Computer Management MMC.
[NOTES FROM THE FIELD] - What your Start Menu options
look like all depend on how you have the menu set. If you
are using the Classic Start Menu, you would not see My Computer
as a selection to right click on. Your options would be to click Start,
select Administrative Tools and then select Computer
Management. Not a whole lot different, but perhaps just enough to confuse you.
I seem to continually repeat this from article to article, but it is important to stress, the
Windows XP Professional exam rarely tests you on Classic
anything. You need to know how to get from Windows XP
Professional settings to Classic and back, but in 90% of the
cases you're going to find instructions laid out in the
Windows XP Professional vein. I will do my best to point out
alternatives in the [NOTES FROM THE FIELD] section as I have done here.
If you want to directly open the
Local Users and Groups MMC you can type
lusrmgr.msc from the RUN box or from a command line. This
will run the tool independently from the Computer Management MMC.
You can also launch the Control Panel and select the User Accounts
icon as well.
[NOTES FROM THE FIELD] - User Accounts and the Local
Users and Groups MMC both function differently while
performing the same task. I will cover the User Accounts
functionality separately.
Adding USERS with the Local Users and
Groups MMC
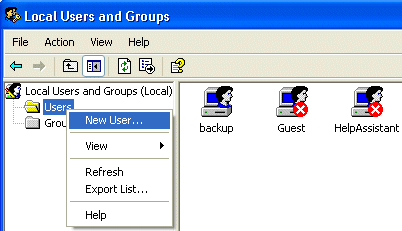
Adding a user is as simple as selecting Users from the left pane, right clicking
it and choosing New User. You can also highlight
Users by left clicking it and going up to ACTION on the menu
bar and selecting New User.
Depending on your current settings, all you may need to supply in order to create
a user account is a user account name. The full user name,
description, and passwords are not required by default.
To set a
password where one isn't used or to change one that is
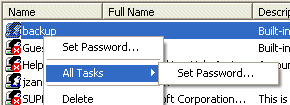
currently set, you would right click on the given account and
choose SET PASSWORD.
You can also right click on the given account and choose ALL TASKS
which leads you to the single SET PASSWORD option as well.
You can also select the user with a single left click and go to
ACTION in the menu to bring up the same ALL TASKS / SET
PASSWORD options as well.
[NOTES FROM THE FIELD] - Passwords are not required by
default but are always a recommended best practice.
There may be a local policy set by some other administrator or if
your system is in a Domain, a Domain policy setting, which
may force you to use settings that are NOT normally required
by default.
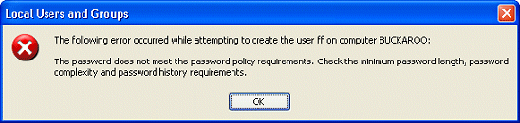
For example, if you try to create an account that has a password
policy in place and you do not meet the minimum requirements
for password creation, you will be presented with an error
message that looks like this;
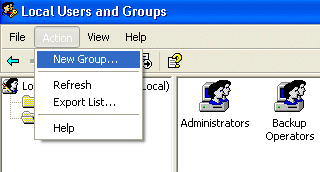
Adding GROUPS with the Local Users and Groups MMC
Adding groups is performed in much the same manner. You can select
Groups from the left pane, right click it and choose New
Group. You can also highlight
Groups by left clicking it and going up to ACTION on the menu
and selecting New Group.
All that is required for creating a Group is the name. Descriptions do
not need to be entered for the group nor do you need to add
any members.
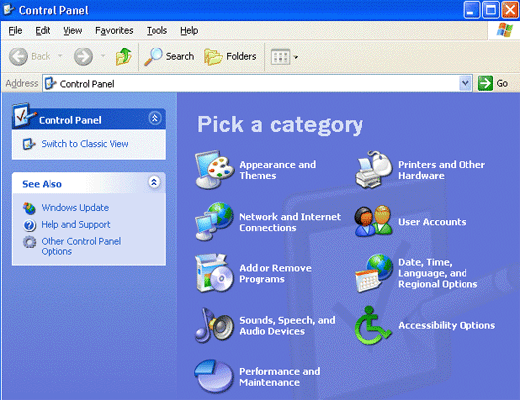
Using USER ACCOUNTS in the
Control Panel.
How USER ACCOUNTS in the Control Panel functions all depends on whether your Windows XP
Professional system is in a domain or not.
Also, how it looks depends on whether you are using the default
Windows XP view or the Classic interface.
This is the default Windows XP view.
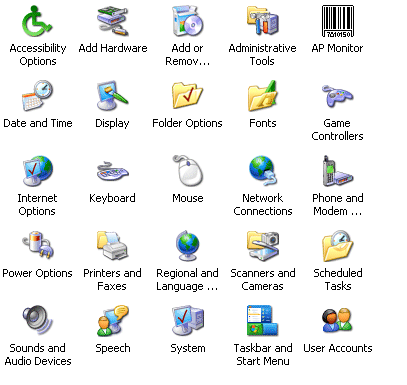
Below is the Classic view.
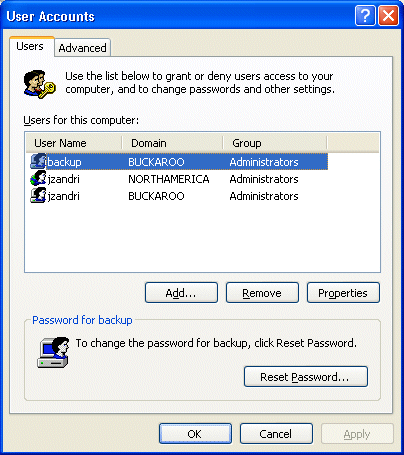
When you are in a domain and you open the USER ACCOUNTS icon
in the Control Panel you are presented with the User Accounts view as shown below
on the USER tab.
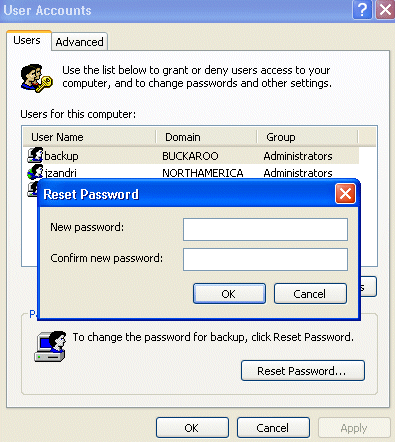
NOTES FROM THE FIELD] - The "domain" BUCKAROO in this
example is the local system and not a domain. NORTHAMERICA
is a domain. The icons for a local account have a
computer/user icon. In the above image in the Password for
backup section you can see this. A DOMAIN icon in the Users
for this computer section would have a planet/user icon
combination as shown below.
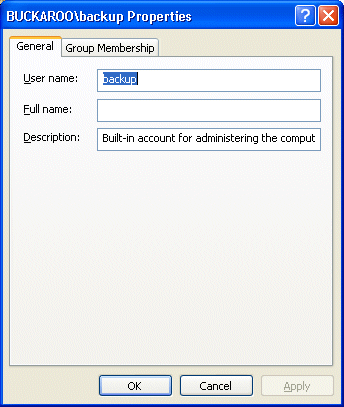
In order to see the properties of an account, you would select it
and click on the properties button to see the following
window.
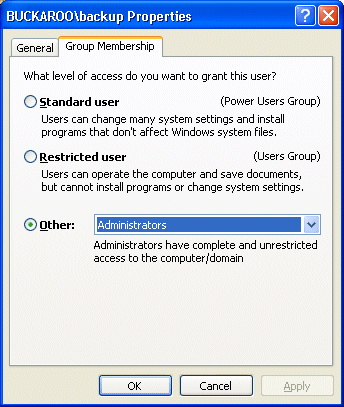
On the Group Membership tab of the USER property sheet you would see three selections to choose
from regarding group memberships.
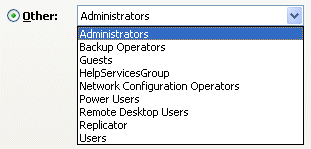
The OTHER drop down window lists all of the LOCAL groups that the user
could belong to.
The OTHER drop down window lists
only the local groups, regardless of whether you have chosen
a user account in the local accounts database or a domain
account that is in the domain.
You can change the password for
a given account from the USER tab by selecting the account
and clicking the RESET PASSWORD button, which will bring up
the RESET PASSWORD window as shown below.
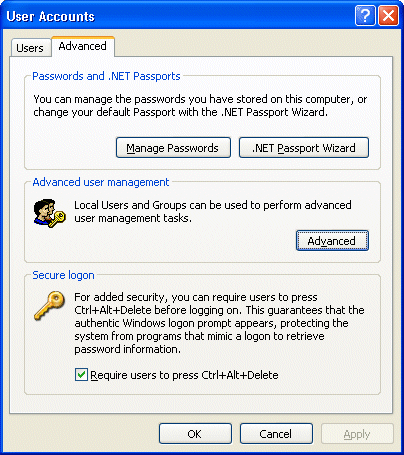
From the ADVANCED tab you can
manage passwords that are in the local database.
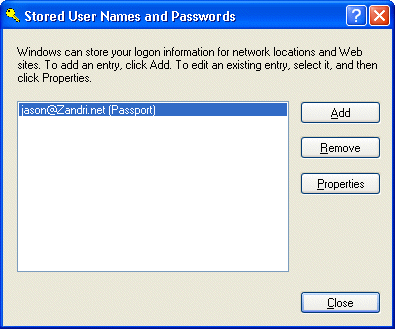
By selecting the MANAGE
PASSWORDS button you will open the Stored User Names and
Passwords where you can add, remove or view the properties
of an account.
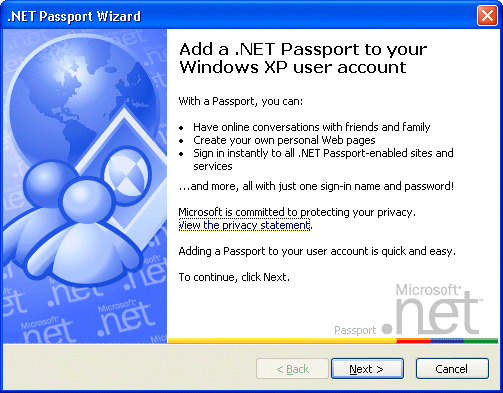
When you select the .NET
PASSPORT WIZARD, the wizard will start and allow you to add
a .NET passport to one or more Windows XP Professional user
accounts.
Selecting ADVANCED from the Advanced User Management section simply launches the Local
Users and Groups MMC as if you typed lusrmgr.msc from the RUN box or from a command line.
The secure logon section is where you would require local users to press CTRL+ALT+DEL to
begin a session.
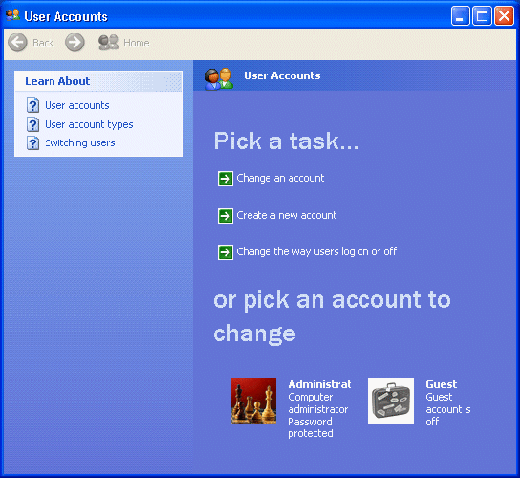
When you are not in a domain and you open the USER ACCOUNTS icon
in the Control Panel you are presented with the User
Accounts view as shown below.
To change any of the listed accounts you would select CHANGE AN
ACCOUNT and select the account you wish to change. It's here
that you can change the password, change the icon (picture)
that is associated with the account or to set up the account
to use a .NET passport.
The CREATE A NEW ACCOUNT option allows you to do just that.
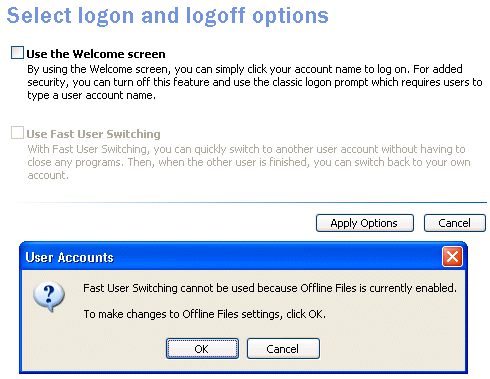
The CHANGE THE WAY USERS LOG ON OR OFF option allows you to select
either FAST USER SWITCHING, (which is not allowed when the
workstation is a member of a domain) or using the standard
USE THE WELCOME SCREEN option.
NOTES FROM THE FIELD] - Fast User Switching cannot be used if the Offline Files
option is enabled. Also, once your system is added to a
domain you can no longer use Fast User Switching, even if
you log on to the workstation by using the local user
account database.
That's a wrap for this week. Be sure to check back in next week for
the next article in this series.
In the meantime, best of luck in your
studies and please feel free to contact me with any
questions on my column and remember,
F.Y.I. can mean more than one thing.
Jason Zandri