In Microsoft Windows XP Professional, you will find a number of
default local groups on your system, which can perform the
following default functions as outlined;
Administrators
Members of the
Administrators group have complete and unrestricted
access to the computer and can perform all
administrative tasks. The built-in
Administrator account is a member of this group by
default and should the Windows XP Professional system be
joined to a domain, (or domains) the Domain Admins group
of the domain(s) joined will be added to the local
Administrators group as well.
Backup Operators
Members of the Backup
Operators group can use Windows Backup (NTBACKUP) to
back up and restore data to the local computer. Being in this group
allows them to override security restrictions for the
sole purpose of backing up or restoring files.
Guests
Members of the built in
Guests group are limited to only having access to
specific resources for which they have been assigned
explicit permissions for and can only perform specific
tasks for which they have been assigned explicit rights.
This is nearly the same
access level as members of the Users group except for
some additional restrictions.
By default, the built-in
Guest account is a member of the Guests group. When the
Windows XP Professional system is joined to a domain,
(or domains) the Domain Guests group of the domain(s)
joined will be added to the local Guests group as well.
Power Users
Members of the Power
Users group can create and modify local user accounts on
the computer and share resources. Effectively, they are
one group lower in authority on a local system from the
Administrators group in that they possess most
administrative powers with certain restrictions.
Users
Members of the Users
Group are prevented from making accidental or
intentional system-wide changes and they are only
slightly higher in the permission scheme than the Guests
Group.
Members of the Users
group are limited to only having access to specific
resources for which they have been assigned explicit
permissions for and can only perform specific tasks for
which they have been assigned explicit rights.
When a new user is
created on a Windows XP Professional system it is added
to the Users group by default.
When the Windows XP
Professional system is joined to a domain, (or domains)
the Domain Users group of the domain(s) joined will be
added to the local Users group as well.
[NOTES FROM THE FIELD] - The built-in Administrator
account is enabled by default and cannot be deleted from the
system. The name of the account as well as the password can
be changed, however, and this is a recommended best
practice. It is also recommended that the default
Administrator account never be used or used as infrequently
as possible and only when tasks need to be performed at an
Administrative level. If there is ever more than one
Administrator on a workstation, each one should have an
account created for their use. In the event that you need to
log administrative events, this would be easier if there
were a number of different administrator accounts created
rather than a single one.
The Guest account also cannot
be deleted from the system, however it is DISABLED by
default and unless there is some required operational need
it should stay disabled. The only "need" for the Guest
account would be a kiosk type terminal in a lobby of an
office building or hotel and in that event it could be used.
If there is ever a short time need to grant access to a
temporary user to a system it's is always worth the
"aggravation" to create an account.
Also, it is not recommended
to change any of the default permissions and other settings
to the built in groups. If you need to elevate or lower
permissions for all users in a built in group it is almost
always better to create a new group, place all of the
intended users into that group and make adjustments there
accordingly.
Using
the Local Users and Groups Snap-in
Groups are
used in Windows XP Professional (and other Microsoft
operating systems) as collection point for user accounts to
aid in simplifying system administration by allowing you to
assign permissions and rights to the group of users rather
than to each user account individually.
Local
groups are used on individual systems to assign permissions
to resources on that specific computer. Local groups are
created and administered in the local security database on
Windows XP Professional systems.
You would
normally need to be a local administrator to perform most
system configuration functions (even just taking a look at
the current configuration settings in some instances) on a Windows XP
Professional system, and in some cases, there may be a local
policy set by some other administrator or if your system is
in a Domain, a Domain policy setting, which may prevent you
from performing some actions.
To manage
local users and groups you can use the Local Users and
Groups MMC and you can access this tool a number of
different ways.
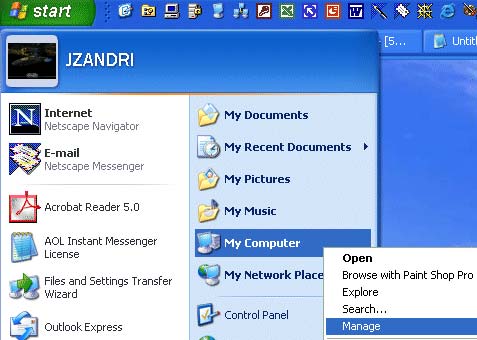
One way is
to select Start, right-click My
Computer, and then click Manage, which will open the
Computer Management MMC. Under the System tools icon,
click Local Users and Groups to open the Local Users and
Groups MMC.
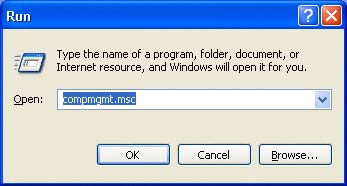
You can
also type compmgmt.msc in the RUN box or from a command line
to launch the Computer Management MMC.
[NOTES FROM THE FIELD] - What your Start Menu options
look like all depend on how you have the menu set. If you
are using the Classic Start Menu, you would not see My Computer
as a selection to right click on. Your options would be to click Start,
select Administrative Tools and then select Computer
Management. Not a whole lot different, but perhaps just enough to confuse you.
I seem
to continually repeat this from article to article, but it
is important to stress, the
Windows XP Professional exam rarely tests you on Classic
anything. You need to know how to get from Windows XP
Professional settings to Classic and back, but in 90% of the
cases you're going to find instructions laid out in the
Windows XP Professional vein. I will do my best to point out
alternatives in the [NOTES FROM THE FIELD]
section as I have done here.
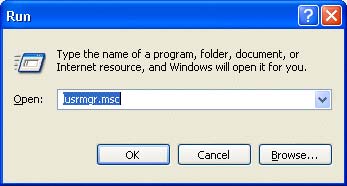
If you want to directly open the
Local Users and Groups MMC you can type
lusrmgr.msc from the RUN box or from a command line. This
will run the tool independently from the Computer Management MMC.
Adding GROUPS with the Local Users and
Groups MMC
Some quick
points to remember for local groups on Windows XP
Professional systems that are not domain members are that
Local groups can contain only local user accounts from the
local security database and local groups cannot belong to
any other group. (Local groups cannot be nested one inside
of the other.) For example, user accounts can be members of
both the WORKERS group and the COFFEE group and even though
every single user of one group is a member of the other, you
would not be able to add all the users to the WORKERS group
and then take the WORKERS group and put it in to the COFFEE
group.
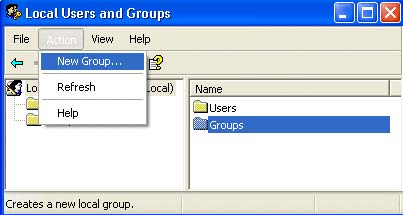
Adding a
new group is as simple as selecting Groups from the left pane, right clicking
it and choosing New Group. You can also highlight
Groups by left clicking it and going up to ACTION on the menu
bar and selecting New Group.
Depending
on your current settings, all you need to supply in order to create
a new group is the name. In most cases the description and
adding users at the time is not required by default.
[NOTES FROM THE FIELD] - There are certain characters that cannot be used in the
name of any group on a Windows XP Professional system. These
are;
Using USER ACCOUNTS in the
Control Panel to add users to EXISTING groups.
[NOTES FROM THE FIELD] - You cannot create a new group using this tool. You need
to use Computer Management to create new groups. You can add
users to existing groups in a limited fashion via this
method.
How USER ACCOUNTS in the Control Panel functions all depends on whether your Windows XP
Professional system is in a domain or not. Also, how it looks depends on whether you are using the default Windows XP view or the Classic interface. This is the default Windows XP view.
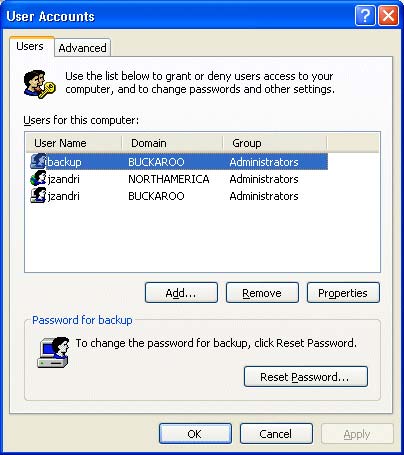
When you are in a domain and you open the USER ACCOUNTS icon
in the Control Panel you are presented with the User Accounts view as shown below
on the USER tab.
NOTES FROM THE FIELD] - The "domain" BUCKAROO in this
example is the local system and not a domain. NORTHAMERICA
is a domain. The icons for a local account have a
computer/user icon. In the above image in the Password for
backup section you can see this. A DOMAIN icon in the Users
for this computer section would have a planet/user icon
combination as shown below.
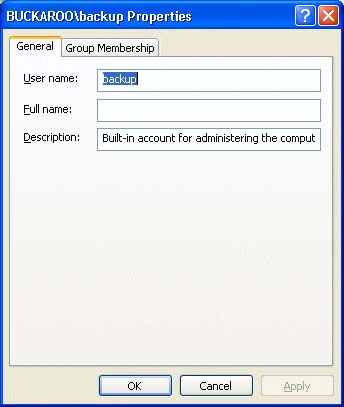
In order to
see the properties of an account, you would select it
and click on the properties button to see the following
window.
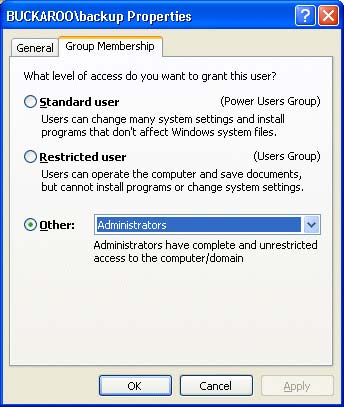
On the
Group Membership tab of the USER property sheet you would see three selections to choose
from regarding group memberships.
The OTHER
drop down window lists all of the LOCAL groups that the user
could belong to.
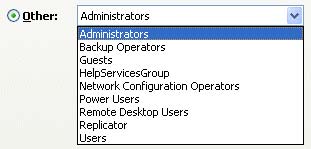
The OTHER drop down window lists
only the local groups, regardless of whether you have chosen
a user account in the local accounts database or a domain
account that is in the domain.
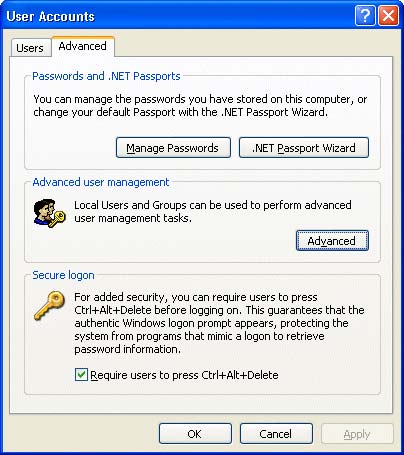
From the ADVANCED tab you can
perform functions such as managing passwords that are in the local database
or using the .NET PASSPORT WIZARD to add a .NET passport to
one or more Windows XP Professional user accounts..
Selecting ADVANCED from the
Advanced User Management section simply launches the Local
Users and Groups MMC as if you typed lusrmgr.msc from the RUN box or from a command line.
The secure logon section is
where you would require local users to press CTRL+ALT+DEL to
begin a session.
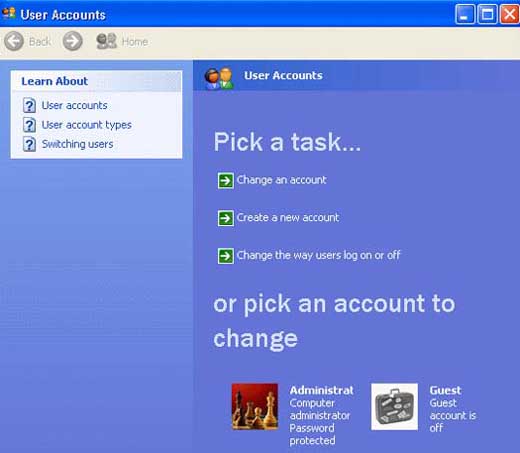
When you are not in a domain and you open the USER ACCOUNTS icon
in the Control Panel you are presented with the User
Accounts view as shown below.
To change
any of the listed accounts you would select CHANGE AN
ACCOUNT and select the account you wish to change. It's here
that you can change the password, change the icon (picture)
that is associated with the account or to set up the account
to use a .NET passport.
The CREATE A NEW ACCOUNT option allows you to do just that.
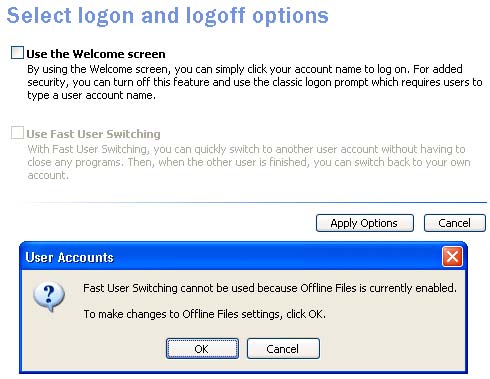
The CHANGE THE WAY USERS LOG ON OR OFF option allows you to select
either FAST USER SWITCHING, (which is not allowed when the
workstation is a member of a domain) or using the standard
USE THE WELCOME SCREEN option.
NOTES FROM THE FIELD] - Fast User Switching cannot be used if the Offline Files
option is enabled. Also, once your system is added to a
domain you can no longer use Fast User Switching, even if
you log on to the workstation by using the local user
account database.
As you can also see there is
no place here to create a new group. As I mentioned earlier,
that would need to be handled through Computer Management.
You would need to use the
Computer Management snap-in to delete local groups from the
system. Windows XP Professional uses a unique identifier
value to identify groups and their assigned permissions, so
if you should delete a group from the local system and then
decide it was in error, creating the group "again" with the
same name will not automatically allow for all of the same
permissions and access levels for it's members.
When performing a group deletion, you only delete the group
and its associated permissions and rights, not the user
accounts in it's membership.
To delete a group you would
right-click the group name in the Computer Management
snap-in and then click Delete. The users would still be on
the system. If their deletion was also required as part of
removing a group of summer users or interns for example, the
individual users would still need to be deleted.
Built-In System Groups
Built-in system groups exist on Windows XP Professional
systems and while they do have specific memberships that you
can modify, you cannot administer the groups directly, they
are available for modification when you assign user rights and permissions to
resources. Built-in system group membership is based on how
the computer is accessed, not on who uses the computer. The
list below shows the primary built-in system groups and
their default properties and characteristics.
Built-in System group
Description
Everyone
The Everyone group
contains all of the users who access the computer. The
Full Control permission is assigned to the Everyone
group (and thus all the users in it) whenever there are
volumes on the local system formatted with NTFS.
Authenticated Users
All users with valid
user accounts on the local system are included in the
Authenticated Users group. When your Windows XP systems
is a member of a domain, (or multiple domains) it
includes all users in the Active Directory database for
that given domain. Using the Authenticated Users group
for resource and system access instead of the Everyone
group is a suggested best practice.
Creator Owner
The Creator Owner
designation comes into play when a member of the
Administrators group creates a resource, (or takes
ownership of a resource) because even though an
individual member may have performed the action, the
Administrators group owns the resource.
Network
The Network Built-in
System group contains any user with a current connection
from a remote system on the network to a shared resource
on the local system.
Interactive
Members of the
Interactive Built-in System group are "added" as they
log on locally to the system.
Anonymous Logon
An Anonymous Logon user
account that Windows XP Professional cannot authenticate
is put into this Built-in System group.
Dialup
Users are "added" to the
Dialup Built-in System group once they establish a
dial-up connection to the system..
You can set or revoke
permissions to these Built-in System groups at the resource.
(e.g. share, NTFS folder, printer, etc.)
[NOTES FROM THE FIELD] - The Dialup Built-in System group does not appear on
systems that do not have modems installed and dial up
configurations in place.
That's a wrap for this week. In the meantime, best of luck in your studies and please feel free to contact me with any questions on my column and remember,