Windows 7 is the latest release of the Windows series of operating systems by Microsoft. It can be used on a range of personal computers like desktops, laptops, and notebooks.
This guide will help you to perform a custom installation or clean installation, which means installing a new Windows 7 operating system on a computer.
System Requirements:
Before installing Windows 7 on your computer, ensure that your computer has:
1 gigahertz (GHz) or faster 32-bit (x86) or 64-bit (x64) processor
1 gigabyte (GB) RAM (32-bit) or 2 GB RAM (64-bit)
16 GB available hard disk space (32-bit) or 20 GB (64-bit)
DirectX 9 graphics device with WDDM 1.0 or higher driver
Clean Installation Instructions:
Insert the Windows 7 setup DVD into the disk drive. The Windows setup will automatically start the installation. If your computer does not start with the Windows 7 Setup DVD, then make the required changes in your BIOS and make your CD/DVD drive the primary boot device.
Select the language that you want to use during the installation process.
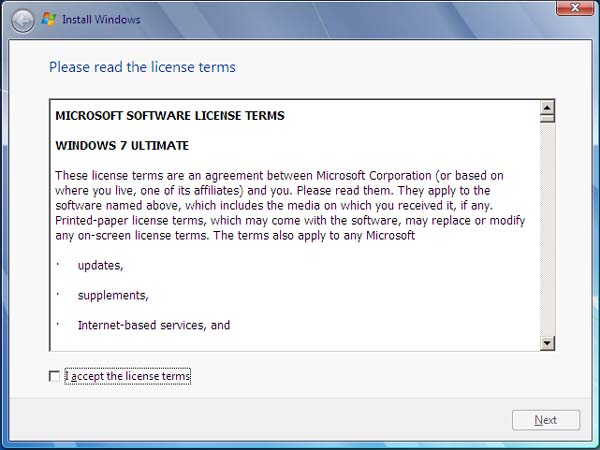
Next, click the Install Now button to initiate the installation. The Setup transfers some temporary files from the DVD to your computer. The Please read the license terms page appears. Select the I accept the license terms check box.
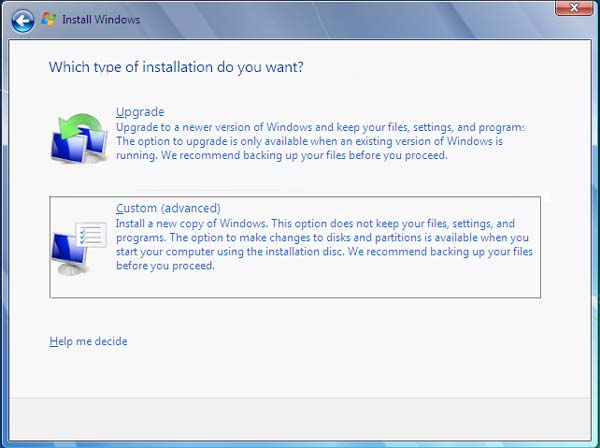
Select the Custom (advanced) install option.
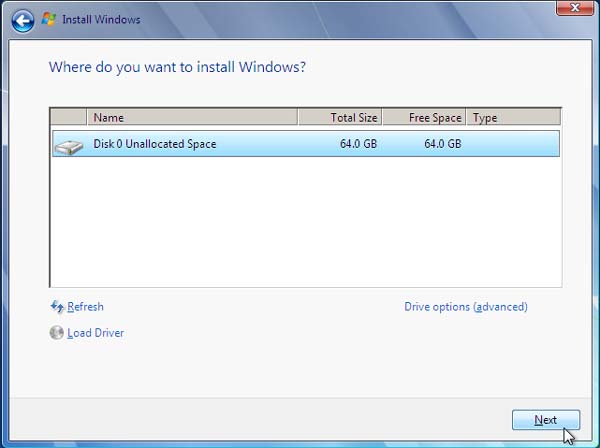
Select the hard disk drive or partition on which you want to install Windows 7.
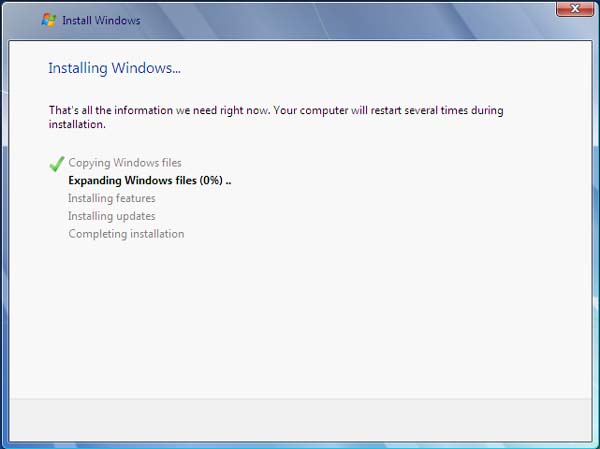
Setup copies the program files to your system.
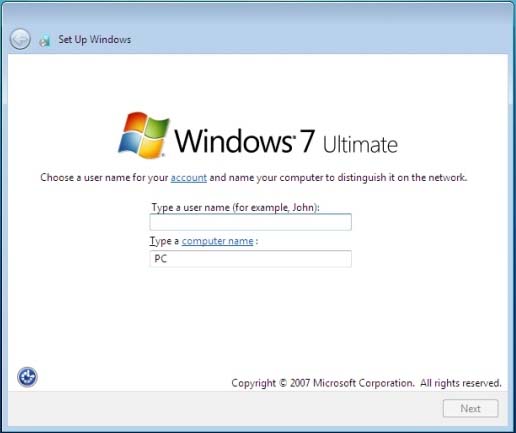
Toward the end of the installation process, your system restarts several times, and then Setup updates the registry settings. Next, Windows prompts you to perform some post-installation tasks, like selecting the user name and the computer name.
Set the system password for your user account and enter a hint for the password.
Type the activation key.
Set the date and time.
Select the appropriate network settings and create a group depending on the type of Network you have chosen.
Your Windows 7 installation is ready for use.
Dual Booting Windows 7 with Windows Vista:
To install Windows 7 on a computer in dual boot mode, which is already running Windows Vista, follow these steps:
If you need to create a new partition on your systems hard disk to accommodate the new operating system (Windows 7), follow these steps:
1) In Windows Vista, click Start, right-click My Computer, and click Manage.
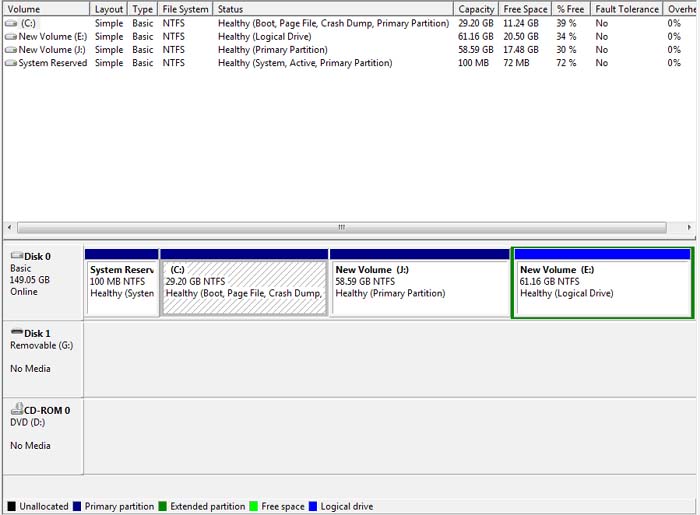
2) Click Disk Management in the left pane. You can now view the current partitioning scheme on your system.
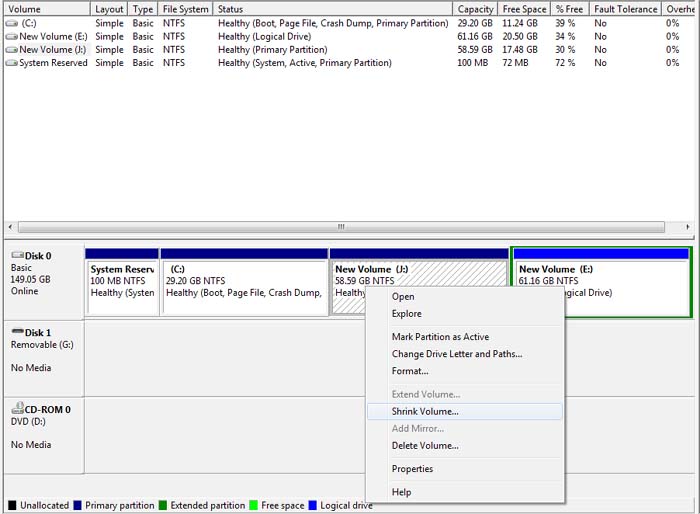
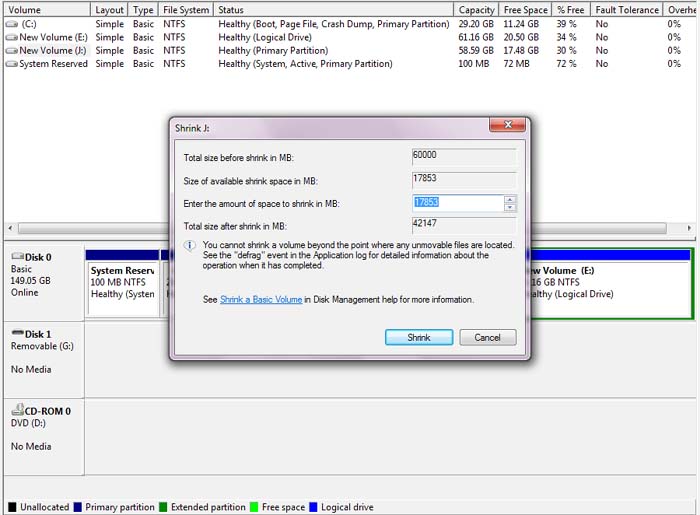
3) Right-click on the partition that you want to resize. The screen shows information on the capacity of the drive. In addition, it provides you the option to enter the amount you'd like to shrink your partition by. The recommended minimum partition size for Windows 7 is 16GB. Select 16GB or a larger size for your partition, and then click Shrink Volume.
You can now see the unallocated space on your hard disk with the capacity you specified, situated just after your now resized original partition.
4) Right-click the unallocated volume, select New Simple Volume, and assign it a drive letter.
5) Perform Quick format of the new volume using the NTFS file system and the default allocation unit size. The volume label is optional, but you can assign it the label - Windows 7, which will help you to recognize the partition during installation process.
After creating the partition, perform clean installation of Windows 7 by following procedure given earlier in this guide. After the installation process is complete, youll have a new entry for Windows 7 on your boot screen when you first start-up your computer. On the boot screen, choose the Operating System with which you want to start your computer. Windows 7 can also be dual booted with Windows XP, or you can triple boot your system with Windows7, Windows XP and Windows Vista.
Installing Windows 7 From a USB Drive:
For this installation, youll require the following:
USB Drive (minimum 4 GB)
Windows 7 installation files
Follow these steps to convert your USB drive into a bootable USB drive, which you can then use for Windows 7 installation:
Connect the USB drive. Note that the USB drive should not have any data. If it has any data, move your data to some other location.
Click Start, then click All Programs, and then click Accessories.
Right-click CMD, and select Run as administrator.
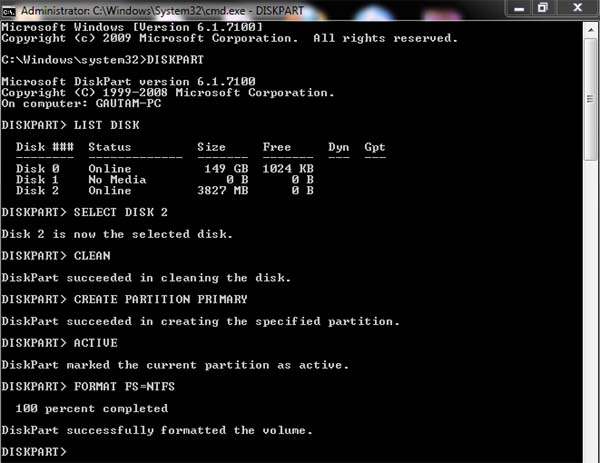
At the command prompt, type the following commands, as shown below:
DISKPART LIST DISK (This command will list the disk numbers for all the hard disk drives and USB drives on your system.) SELECT DISK 2 (As system has listed the USB drive as DISK 2) CLEAN CREATE PARTITION PRIMARY ACTIVE FORMAT FS=NTFS (This process will take some time to complete) ASSIGN EXIT
Insert your Windows7 DVD into the DVD drive and check the drive letter of the DVD drive. Suppose the drive letter is D. Type the following command at the command prompt:
D: CD BOOT (where D is the drive letter for DVD) CD BOOT
Next, type the following command at the command prompt:
BOOTSECT.EXE /NT60 F: (where F is the drive letter for the USB drive.)
Copy the contents of the Windows 7 installation DVD to the USB drive.
The USB drive is now ready for installation. You will need to change the BIOS to boot from the USB drive. To perform an installation using the USB drive, follow the procedure for clean installation of Windows 7 as given earlier in this guide.
Installing Windows 7 Using Windows Deployment Services:
Windows Deployment Services (WDS) is the updated and redesigned version of Remote Installation Services (RIS). With WDS you can install Windows operating systems over the network. This eliminates the need to install Windows on individual computers using the local CD drive or DVD drive. WDS uses the Pre-Boot Execution environment (PXE) or Trivial File Transfer Protocol (TFTP) service on the host computer to boot from the WDS Server.
You need to install the WDS service on the computer that you want to use as a WDS Server. Here well install and configure this service on Windows Server 2008. On the WDS Server PXE and TFTP servers are required for network booting of the client on which installation is to be done. Follow these steps to install WDS on Windows Server 2008:
Open Server Manager, click Add Roles and then click Next.
On the Select Server Roles screen, select Windows Deployment Services, and then click Next.
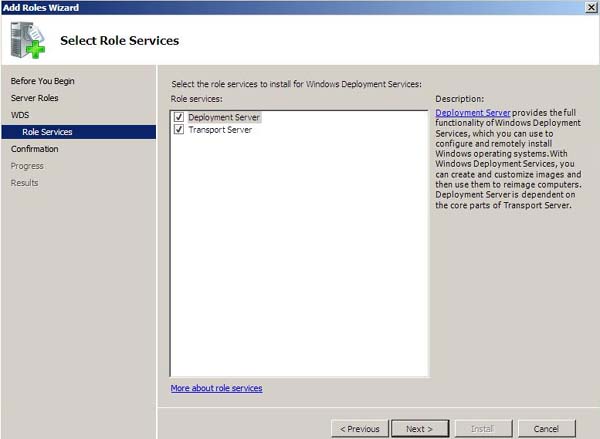
On the Role Services screen, select Deployment Server and Transport Server, then click Next and then click Install.
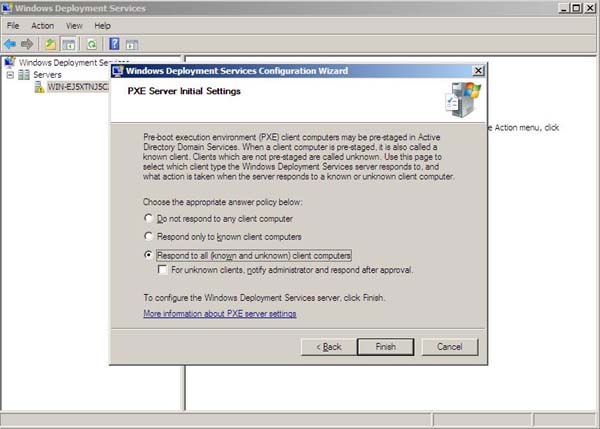
Next, configure the PXE Server settings. Select Respond to all (known and unknown) client computers and then click Finish. Once a computer is linked to a computer account object in AD DS, the computer is considered prestaged or "known". For security reasons, you may opt to select PXE to only respond to known computers, or if you make the selection used in our instructions, you may want to click the For unknown clients, notify administrator and respond after approval checkbox.
Adding a Boot image on the WDS Server:
Boot images are Windows images that are used to boot a client computer, and install an operating system on the computer. To add a boot image on the WDS Server, perform these steps:
Click Start, then click Administrative Tools, and then click Windows Deployment Services.
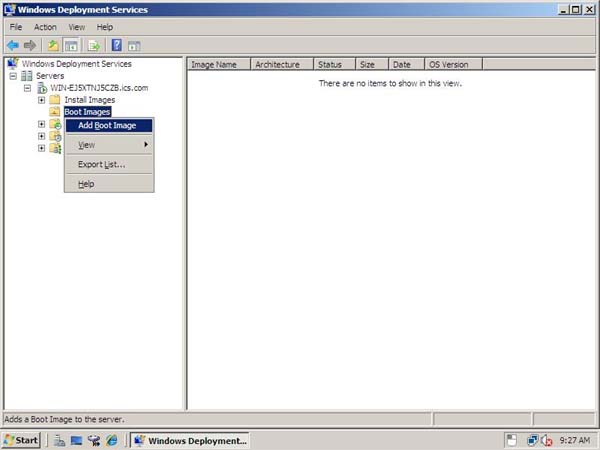
Open the Windows Deployment Services management console.
Right-click the Boot Images node and then click Add Boot Image.
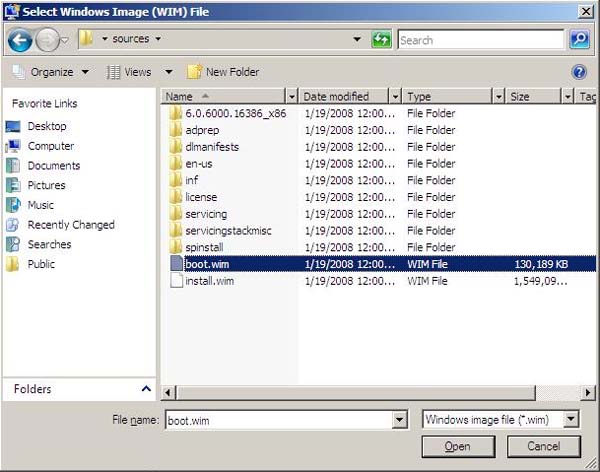
Click Browse to locate the boot image you want to add. Select Boot.wim from the /sources folder on the Windows 7 installation DVD.
Adding an Install Image on the WDS Server:
Click Start, then click Administrative Tools, and then click Windows Deployment Services.
Open the Windows Deployment Services management console.
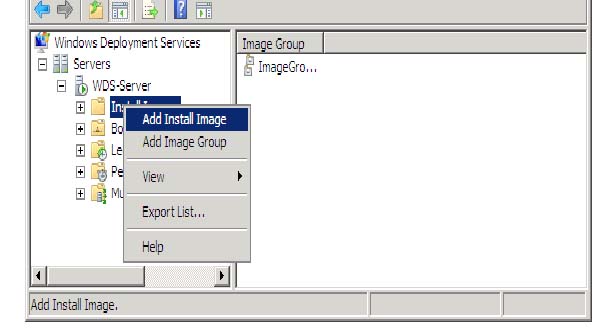
Right-click the Install Images node and then click Add Install Image.
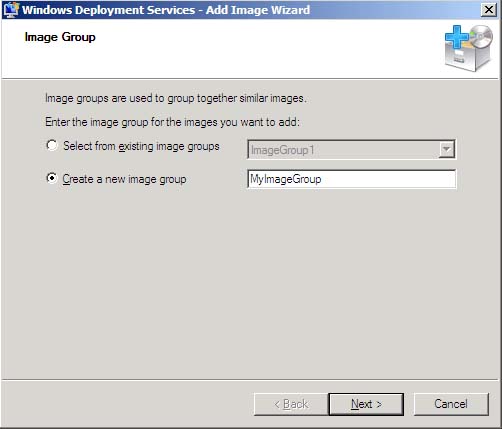
Specify a name for the image group and then click Next.
Click Browse to locate the default install image (Install.wim), which is located in the \Sources folder of the product DVD, and then click Open.
Enter a name and click Save.
Next select Upload image to WDS Server.
Repeat the process if you want to add more than one Install Image to your WDS Server. You must add at least one boot image and one install image before you will be able to boot to the Windows Deployment Services server and install an image.
Installing From an Install Image:
After you have at least one boot and one install image on the server, you can deploy an install image assuming you meet the following requirements:
The client computer must be capable of performing a PXE boot.
Your user account must be a member of the Domain Users group.
The client computer must have at least 512 MB of RAM, which is the minimum amount of RAM for using Windows PE.
The client must meet the system requirements for the operating system of the install image.
To perform a PXE boot on a computer to install an image, use the following procedure.
Configure the BIOS of the computer to enable PXE booting, and set the boot order so that it is booting from the network first.
Restart the computer, and when prompted, press F12 to start the network boot.
Select the appropriate boot image from the boot menu. (This boot image selection menu will be available only if you have two or more boot images on the server.)
Follow the instructions in the Windows Deployment Services user interface.
When the installation is completed, the computer will restart and Setup will continue as it would in a regular clean installation.