System recovery options are a set of tools you can use to repair Windows if a serious error occurs. To open the System Recovery Options menu, follow these steps:
Remove all floppy disks, CDs, etc, and restart your computer.
Press and hold the F8 key while your computer restarts (before the Windows logo appears).
On the Advanced Boot Options screen, use the arrow keys to highlight Repair your computer and then press Enter. If this option isn't available, your computer doesnt have the recovery options installed and you will need to get them from the Windows installation disk.
Select a keyboard layout and then click Next.
Note: If your computer has more than one operating system, use the arrow keys to select the operating system you want to repair, then press and hold F8.
After performing these steps, you will see the screen below:
On this screen you can access the following tools:
Startup Repair: Fixes certain problems, such as missing or damaged system files, that might prevent Windows from starting correctly. Startup Repair isn't designed to fix Windows installation problems, nor is it a backup tool, so it can't help you recover personal files, such as photos or documents.
System Restore: Restores your computer's system files to an earlier point in time without affecting your files, such as e-mail, documents, or photos. Restore points are created automatically every week, and just before significant system events, such as the installation of a program or device driver. You can also create a restore point manually.
System Image Recovery: You need to have created a system image beforehand to use this option. A system image is a personalized backup of the partition that contains Windows, and includes programs and user data. A system image is an exact copy of a drive.
Windows Memory Diagnostic Tool: Scans your computer's memory for errors.
Command Prompt: Self-explanatory.
System Repair Disc:
If the system recovery options are not installed on your computer, and you do not have access to the Windows installation disk, you can gain access to the tools above by creating a system repair disc. To do this, follow these steps:
Click Start, then click Control Panel, click System and Maintenance, and then click Backup and Restore.
In the left pane, click Create a system repair disc. You may be prompted for an administrator password or confirmation.
Insert a disc into the drive, and click Create disc.
To use your system repair disc, follow these steps:
Insert the system repair disc into your CD or DVD drive.
Restart your computer using the computer's power button.
If prompted, press any key to start the computer from the system repair disc. If your computer isn't configured to start from a CD or DVD, you may need to change your computer's BIOS settings.
Choose your language settings, and then click Next.
These steps will display the system recovery options box discussed in the previous section.
Configuring Backups:
The Windows 7 Backup and Restore utility enables you to create and restore backups. Backups protect your data in the event of system failure by storing the data on another medium, such a hard disk, CD, DVD, or network location. If your original data is lost because of corruption, deletion, or media failure, you can restore the data by using your saved backup. Windows 7 Backup uses shadow copies to take a snapshot of your files, allowing the backup to completely back up files even if they are open. Follow these steps to configure backup:
Click Start, and then enter backup in the search box.
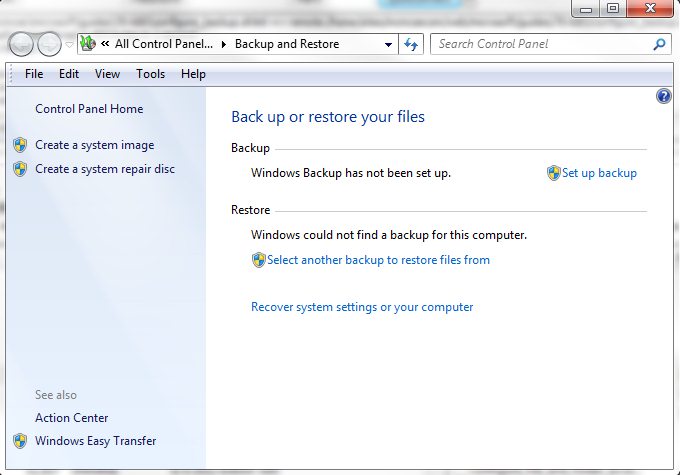
Select Backup and Restore from the results to launch the Backup and Restore applet.
In the Back up or restore your files window, click the Set up backup link.
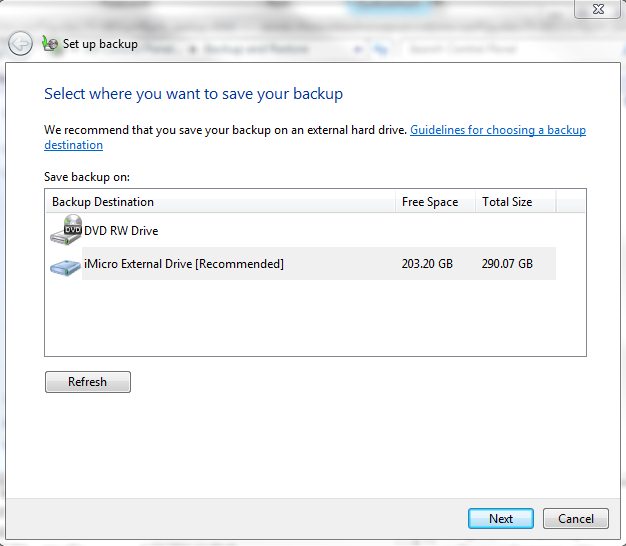
Windows will search for appropriate drives to store the backup and you can also choose a location on your network. Note: you cannot select a destination that has Bitlocker enabled. After selecting the backup destination, click Next.
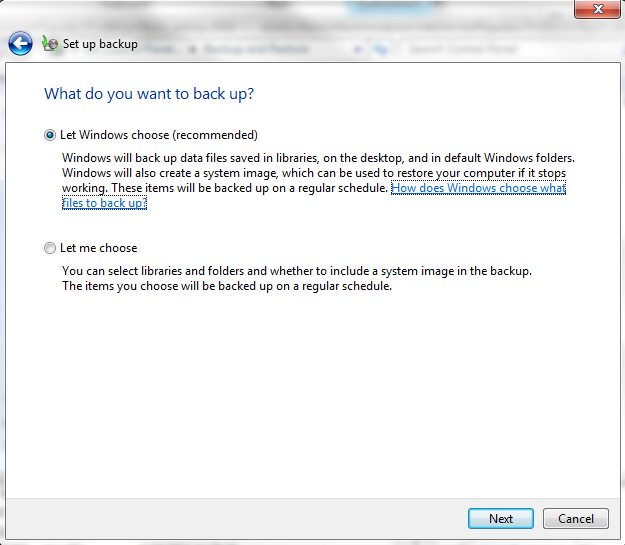
On the next screen you have the option to let Windows choose which files or folders to backup, or you can select Let me choose and select the files and folders yourself.
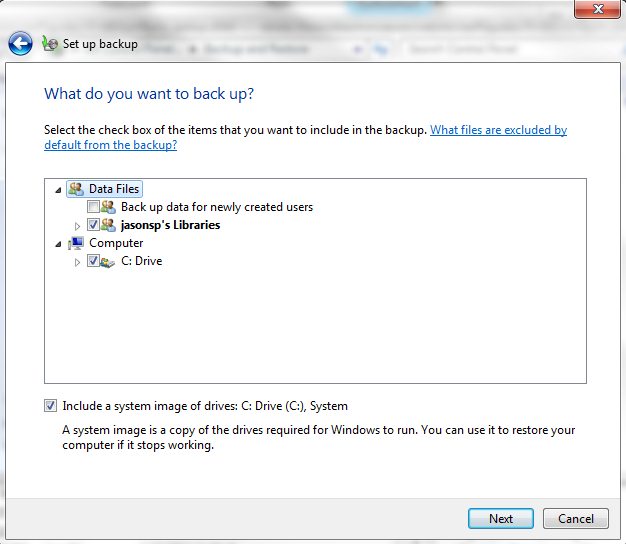
If you chose Let me choose on the previous screen, select the files and folder to be included in the backup. You can also select the option to create a system image of your local drive which is stored in VHD format.
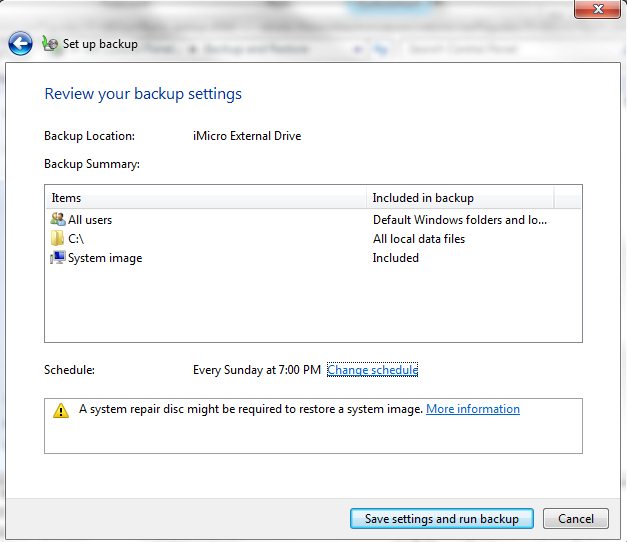
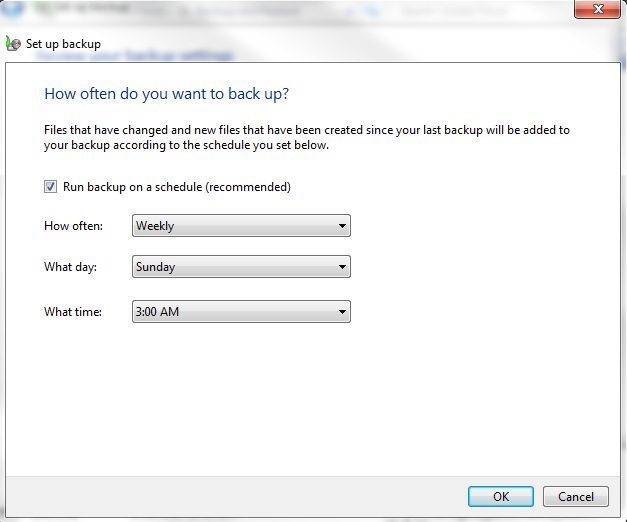
Review the backup job to ensure that backup includes all the required files and folders. You can also click the Change schedule link to configure the days and times for future automated backups. Note that system image backups are not performed during scheduled backups.
If you selected Change schedule, set the interval, day and time you would like your backups to run and click OK.
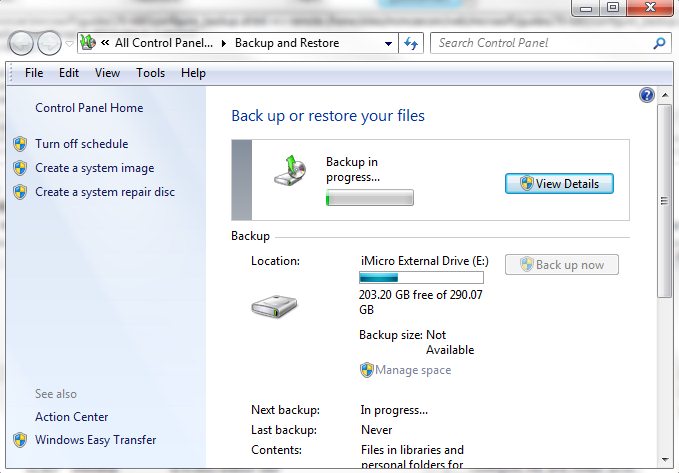
After setting the schedule, click Save settings and run backup.
You will be taken back to the Backup and Restore control panel which will allow you to monitor the progress.
The first backup performed is a full backup, while subsequent backups are incremental, and only backup files that have changed since the last backup.
There are several media types that can be used for backups as follows:
External hard drive - You cannot use an external hard drive for a System Image backup unless the filesystem is NTFS.
USB flash drives - You cannot save System Image backups to a flash drive. A flash drive must at least 1 GB of free space to store a backup.
DVDs - DVDs are inexpensive, however it will likely take several DVDs to complete a single backup. You cannot save scheduled System Image backups on DVDs.
Network location - In order to backup to a network location, you will need the username and password to the share, and you also must be running Windows 7 Professional or higher.
VHD - In Windows 7, you can specify a VHD as a backup location. You can also carry out a System Image backup of an entire volume to a VHD disk image file. On Windows 7 Ultimate and Enterprise editions, you can use the Bcdedit tool to make a VHD bootable so you can boot the computer from a backed-up system image.