Introduction:
Installing modern printers is very easy as most of them are now plug-and-play. One caveat is in regards to the driver. You need to make sure that Windows loads the correct driver for your printer or you may miss out on some of the features of the printer, or you may run into a variety of problems. Best practice is to use the installation disk that comes with the printer, or download an updated driver from the manufacturer's web site. Because there really isn't much to know about printers that install automatically, we are going to walk through the various types of manual printer installation below and then we'll take a look at how to configure and optimize a printer.
Installing a Printer Connected Via the Parallel Port:
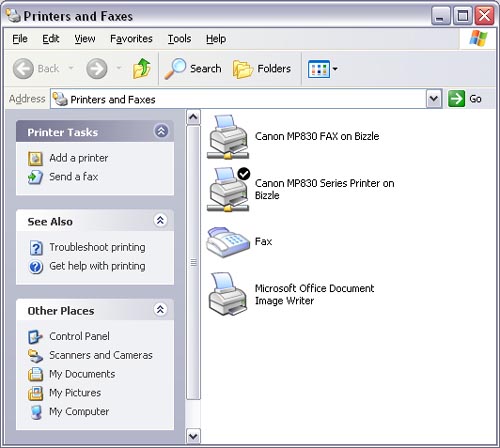
If you need to manually install a printer, first click the Start button and select Printers and Faxes in Windows XP. In Windows 2000, click the Start button, then Settings, then Printers. In both operating systems, this can also be accessed via the control panel.
Notice the printer with a check mark by it. This is known as the default printer.
Now, we simply click Add a Printer to start the installation wizard. Here is what this looks like:
Here you can see that there is an option to add a local printer or a network printer. If the printer is going to be attached with a parallel cable or will be a network printer that doesn't currently have a print server, then you would select local. While USB printers are also local printers, they should have installed automatically via plug-and-play. If we select a local printer, the next screen looks like this:
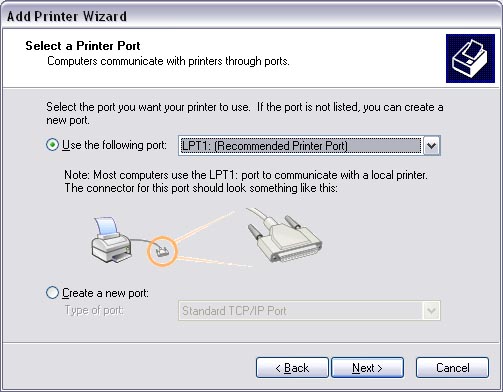
Here we select the port. If the printer is going to be connected with a parallel cable, then in most cases this will be LPT1. If it is an old serial connection or you have multiple parallel ports on the PC, then you will have to choose the appropriate port from the drop down menu.
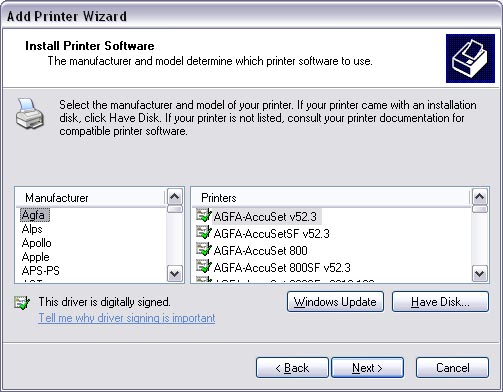
Next, we need to select the driver for our printer. Notice the Have Disk button. You can click this if you need to install the driver from a CD or downloaded driver from the manufacturer.
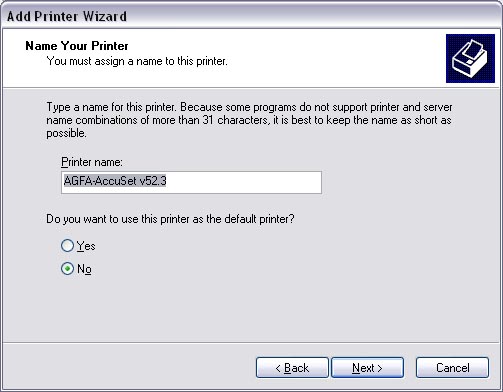
Next we need to give the printer a name. This name is how your printer will be displayed in the printer folder. We also need to decide if this will be the default printer or not. There can be only 1 default printer at a time.
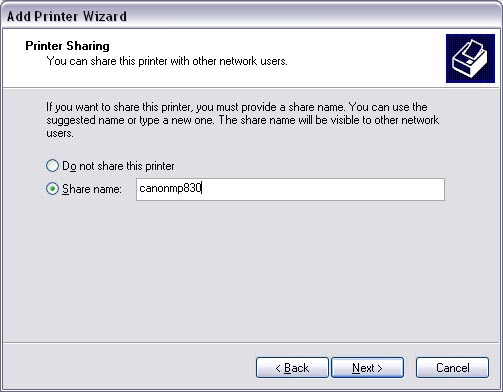
Next, we need to choose whether the printer will or won't be shared. If you choose to share it, you need to give it a share name. The share name is how the printer will appear to those trying to connect to it.
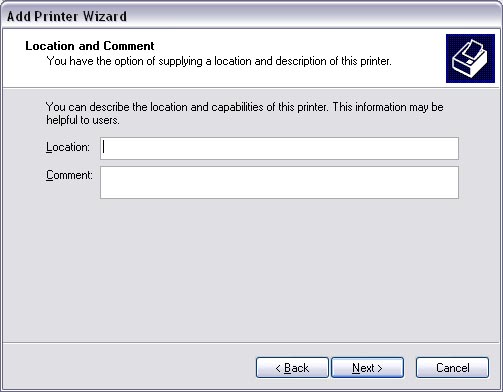
The following window only appears if you choose to share the printer. Here you can add details about the printer that will help other users be sure that they are connecting to the right one.
After this, you have the option to print a test page which is recommended, and then the installation is complete.
Installing a Network Printer - No Print Server Exists:
What you are about to learn is rarely discussed in books and tutorials, but is important to know for the job. There are 2 different types of network printer installation. Most network printers need a print server and a port to function. A print server is a host computer or device to which one or more printers are connected and which accepts print jobs from external client computers. It hosts the queue where client print jobs are spooled and it also hosts the printer port. On most networks, this will be a TCP/IP port.
The instructions in this section will describe how to set up a printer when no other computer or device is acting as a print server. When using this installation method, it will make the computer you are installing the printer on the new print server.
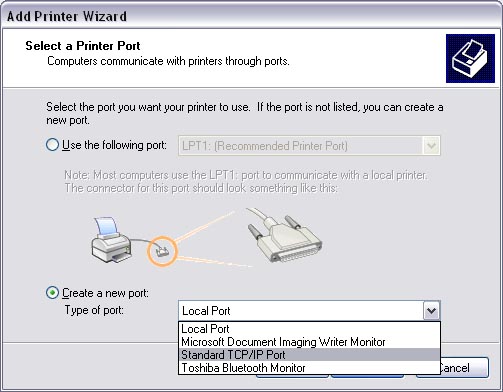
As in the last example, we launch the Add Printer Wizard and indicate that we wish to add a local printer. This time, however, we are going to create a new TCP/IP port as shown below.
When you click Next, it will launch the Add Standard TCP/IP Printer Port Wizard. Click next on the first screen and you will see this:
First, you will need to enter the IP address or host name of the printer and then the desired port name. After this, the Add Standard TCP/IP Printer Port Wizard is finished and the window where you choose the printer driver appears. From here on, the steps are exactly the same as adding a parallel printer described above.
Installing a Network Printer - Print Server Already Exists:
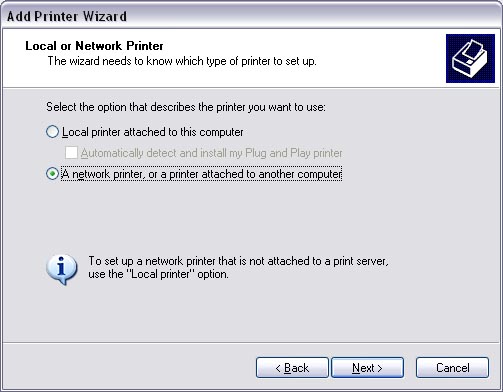
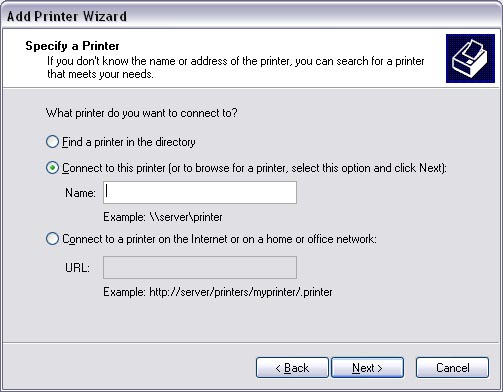
In this scenario, we'll go through the installation of a printer where a print server and port already exists on the network. Just as before, we start by launching the Add Printer Wizard. This time we are going to select the network printer radio button instead of local.
Next, we need to find the printer we want to connect to. The first option allows you to search active directory. Since we know the location of the printer, we are going to use the 2nd option. If you know the path to the printer, you can enter it, or leave the field blank to browse. The 3rd option is for internet printers. Some printers can be accessed over the internet or across a wide area network (WAN). This option will be rarely used.
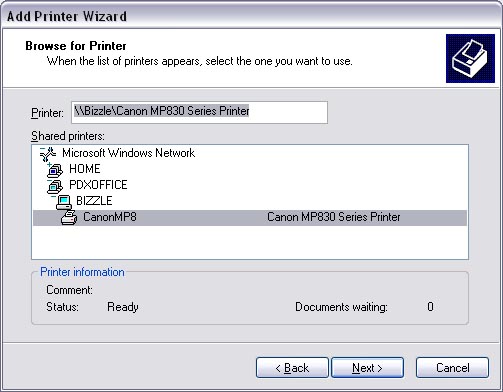
We chose to browse for our printer and found the CanonMP8. Select the printer and click next.
That completes the installation. So why didn't we have to install a driver? The drivers are located on the print server and are installed from there.
The Print Queue:
When you print to a printer, the print job is parsed by the driver and the document is converted into the PDL (PCL, PostScript, etc.) that the printer understands. If you want to see the output of a file after it has been converted by the driver, select the Print to File option in the printer preferences and then open the new file in wordpad. Anyway, after the document is converted it is spooled to the print queue. If there are other documents waiting to print, the document you sent will sit and wait, although there are options that can be set to make your documents jump to the head of the line. The queue is not much more than disk space on your computer where the document sits until it is sent off to be ripped by the printer.
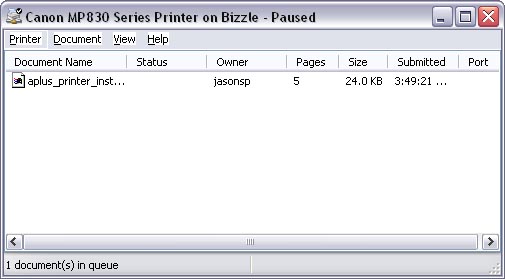
With the right permissions, you can manage the documents in the queue. You can pause, restart, and delete print jobs. Sometimes print jobs get stuck in the queue or have errors and these options allow you to take care of the problem.
The easiest way to view the queue is to click Start and select Printers and Faxes (in Windows XP). Then simply double click on the printer icon and the queue will be displayed as follows:
Note that from the Printer menu, you can access the print preferences and properties, both of which are discussed below.
Printer Configuration:
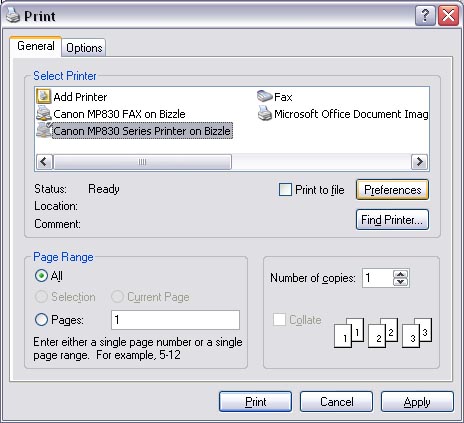
When we talk about printer software, we are mainly referring to the printer's driver which allows you to take advantage of and configure the various features a printer has. Let's take a look at an example to see how this works. Let's say you are using Microsoft Word (or any other application) and click File then Print. This brings up the generic Windows Print dialogue box.
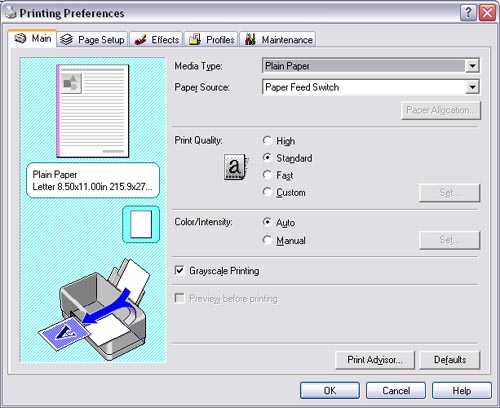
There are a couple of important settings here, but none of them are specific to any printer. If we want to see what our printer is capable of, we need to highlight it, and click the Preferences button on the right. This brings up the setting for our printer from the driver. This is why it is so important to have the correct and latest driver installed. Imagine if you wanted to print from the cassette tray, but the printer driver you have installed doesn't support that feature. That is one of many problems you might run into with the wrong driver.
After clicking the preferences button, we see a window (above) with several tabs. This particular printer is fairly nice and has a ton of features to choose from. We aren't going to get into all of those, but you need to know where to find these.
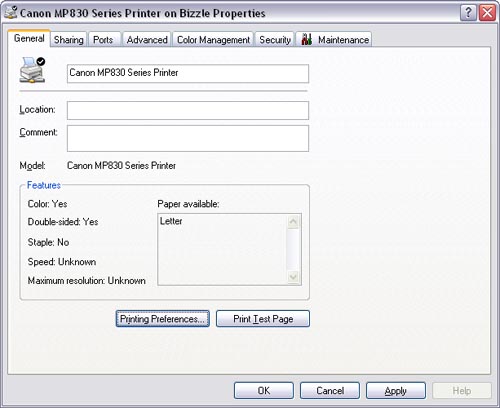
That's a lot of settings to deal with, but there are even more. If we go to the Printer and Faxes folder (via control panel or start menu), we can right click on our printer and select Properties. This brings up the window below:
Within these tabs, we can configure ports, sharing, permissions, color management, and other items. Two important things to notice here. First, the Print Test Page button. This sends a generic test page to the printer and is an invaluable troubleshooting tool. The second is the Preferences button. If we click on this button, it brings up the properties that we saw when clicking the Preferences button earlier. The difference is that if we change settings here, they become the defaults. That means that when you go to print from an application, the settings you enter here will show as default there. For example, let's say that you print in monochrome (black and white) 90% of the time and get tired of having to change the settings to monochrome everytime you print. If you change the setting to monochrome by clicking on the Preferences button in the screen shown above, the printer will be set to print monochrome by default when you print from an application.
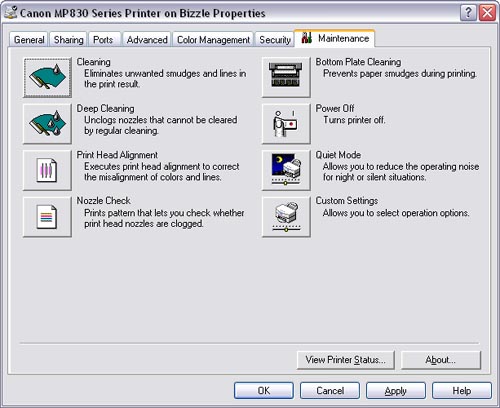
The next thing to note is that in both of the last 2 screen shots there is a Maintenance tab. Not all printers will have this, or they may have it in a different location. If we click on this tab, we see:
If you recall the section on ink jet printers, you might remember that ink jets are prone to clogged nozzles and that they should be cleaned periodically. This is the place to perform cleaning, printhead alignment, and other tasks. The tasks available will depend on the printer as well as the printer type. In other words, maintenance tasks for an ink jet will not be the same as those for a laser printer. Most printers will allow you to perform these tasks from the front panel as well. In fact, some printers will only allow you to do these types of things from the front panel. It just depends on the printer.
Another thing that you may want to configure for your printer is color matching. Computer monitors display color in red, green, blue (RGB) format and most printers print in cyan, magenta, yellow, and black (CMYK). Inevitably, the colors you see on the screen probably will not match those in your prints. Most printer manufacturers provide an International Color Consortium (ICC) profile which can be used to tell the printer to match what is on the screen. ICC profiles are also used for monitors, digital cameras, scanners, and other devices. Some printers come with their own proprietary color matching software as well.